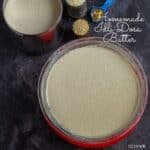
Here is my perfect all in one idli-dosa batter recipe for soft idli and crispy dosa. Check out how to make the basic idli dosa batter in bulk in wet grinder also how to ferment it in Instant Pot as well as in the oven. Don’t miss the troubleshooting tips!
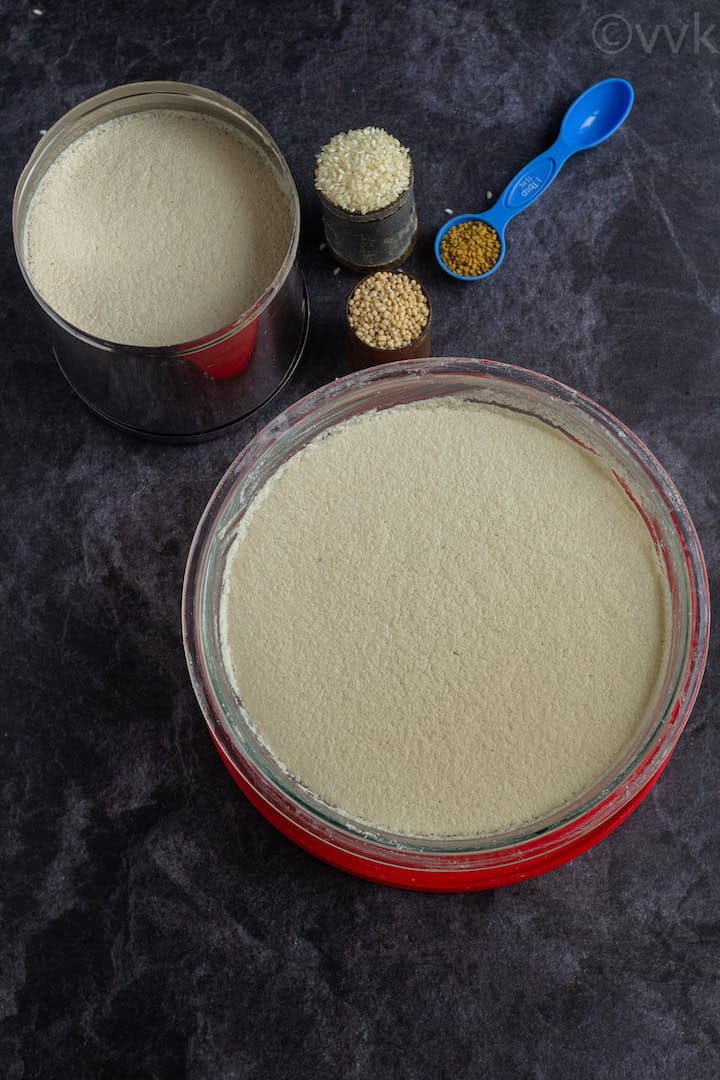
Finally, here I am sharing my way of making the idli-dosa batter recipe that is used in preparing idli, dosai, idli batter pakoras, paniyaram, uthappam, and more – the staple tiffins of South India. Ok, this post is going to be a long one with a ton of tips, and I kindly request you to read it thoroughly. A humble request from me. :-)
Jump to:
- South Indian Staples – Idli & Dosai:
- My Story & When I got Wet-Grinder:
- All-in-One Idli Dosa Batter:
- Idli Dosa Batter in Simple Terms:
- Lactic Acid Fermentation-
- Dos and Don’ts of Idli Dosa Batter:
- Troubleshooting tips:
- Tips to grind the batter in a wet grinder
- How to grind idli dosa batter in a wet grinder & how to ferment the batter-
- Recipe Notes-
- 📖 Recipe
Before getting into the post, let me explain what idli and dosa are.
South Indian Staples – Idli & Dosai:
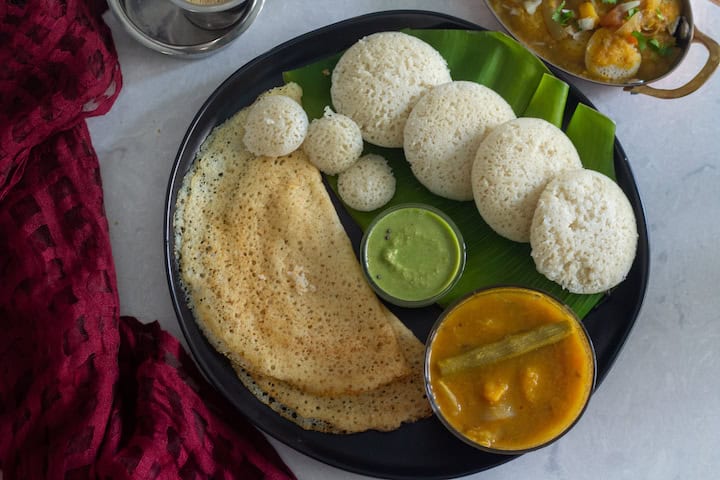
Idli and dosai (in Tamil Nadu, that’s how we say, dosai not dosa) are an integral part of South Indian cuisine, and it is quite popular throughout the world. Go to any South Indian restaurant; you will find idli and different varieties of dosa in both breakfast and dinner menu. We colloquially call idli and dosai tiffin (light meal/snack) even though they are filling.
Idli is a steamed savory cake made with the fermented batter of rice and lentils. Dosai is a savory crepe (you can also make uthappams which are more like pancakes) prepared with the fermented batter of rice and lentils.
Idli is one of the healthiest breakfasts out there. Wondering why? We steam the idlis with a fermented batter, and that says it all. There are no added fats, saturated fats, and cholesterol. It is very light and easy to digest, as well.
My Story & When I got Wet-Grinder:
As you all know, I am from Tamil Nadu, which is known for its hot weather. Be it in my native Periyakulam or in Chennai, we never had fermentation issues. I took it for granted. :-)
Growing up, we never had wet grinders at home, and mom used to grind it the mortar pestle/stone hand grinder. (Aatu ural) It’s quite a task to grind the batter by hand, and slowly mom started using a mixie, and then eventually, we bought a wet grinder.
So when I came to the US, I did not bring any wet grinders. Initially, I was grinding a small batch in Indian mixie, and during summers(Summer in Folsom, CA is real folks), I did not have any fermentation issues. Winter came, and so did the fermentation issues. That’s when my friend taught me how to ferment in the oven. During those times, I used my oven for batter fermentation more than for baking. :-)
When parents started to visit us, grinding the batter in mixie was difficult. So we decided to invest in a wet-grinder, and I got mine from amazon. It’s the Premier small table-top wet grinder (1.5 L), and it’s been 9 plus years, and I don’t have any issues. (Touchwood and this is not a sponsored post). You can use any wet grinders and also bring them from India. Make sure to buy the 110V.
So that’s how my wet-grinding journey started. I learned a lot in due course.
All-in-One Idli Dosa Batter:
In our household, we use the same batter for preparing idli, dosai, and uthappam as well.
After grinding the batter, my mom splits the batter into two portions. She will use one batch for idli, and towards the end with the leftover batter, she makes paniyaram, idli batter pakoras.
With the second batch, she adds little extra water and keeps it for dosai, and she used the leftover well-fermented batter for making uthappams.
I know I am repeating this, like every other recipe, all households have their techniques and tips for idli dosa batter. In this post, I am sharing what I learned from my family and also what I learned in due course of my cooking experience. I do follow some shortcuts and tricks, and purists might not agree. But I am sharing what all has worked for me.
PS – I am explaining the process of making idli dosa batter in a wet grinder, and I will share the blender/mixer method later. Idli dosa batter in mixie/blender is a separate post on its own.
Idli Dosa Batter in Simple Terms:
In simple terms, I can say soak four parts of idli rice and 1 part of urad dal and 2 to 3 tsps of fenugreek seeds separately. Grind the urad dal and fenugreek seeds first and then grind the rice. Mix them and add salt and mix again. Let it ferment, and viola idli dosa batter is ready!
That’s all there in the idli dosa batter recipe, but I can hear many complaints about hard idlis and batter not fermenting, etc.
First of all, please don’t beat yourself for the idli dosa batter. A lot of factors affect the softness of the idli and batter fermentation. So experiment and keep trying. If I can prepare a well-fermented batter, you can definitely, too. Make sure you understand the basics and learn the troubleshooting tips.
Ok, idli batter needs to ferment before we make idlis. See, I am not saying dosa batter here. You can make dosa with freshly ground batter. It won’t be very crisp, and of course, you won’t get the fermented sour taste. We do make dosai with the fresh batter, and we call “puliyaa dosai/புளியா தோசை,” meaning non-fermented dosa. But you can’t do the same for idli.
Lactic Acid Fermentation-
Cooking is both art and science. Before getting into the details, let’s understand the kind of fermentation that happens with the idli dosa batter, and it will help a lot with troubleshooting.
Just search for “lactic acid fermentation in idli batter,” and you will find tons of research articles. Yes, folks, research articles! Let me quote this line from the National Center for Biotechnology Information (NCBI) paper – “The fermentation of idli demonstrates a leavening action caused by the activity of the heterofermentative lactic acid bacterium, L. mesenteroides.”
What I understood after reading quite a few articles is that the predominant microbes involved in the fermentation are the lactic acid bacteria. But every culture(a batter) is different, and they have an entirely different range of microorganisms that are still under research.
Also, the urad dal in the batter plays a major role in creating the culture for fermentation and leavening. And par-boiled rice works best when compared to the regular white rice as it aids in the fermentation.
Instead of explaining the idli dosa batter in a paragraph style, I decided to do it like a FAQ type like how I did for my avial post.
Dos and Don’ts of Idli Dosa Batter:
What rice to use?
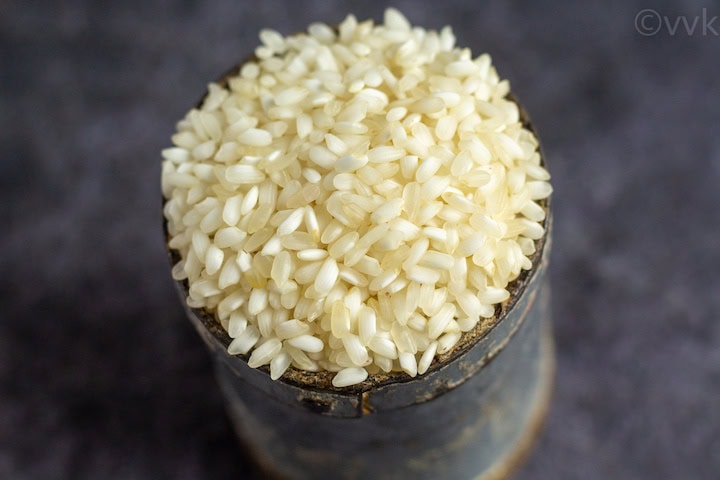
Idli rice is the best. Idli rice is a short-grained par-boiled rice variety used specifically for idli/dosai maavu. (Maavu is the Tamil word for batter) If you can’t source idli rice, then pick any other par-boiled variety. In Tamil, we say puzhungal arisi. You can use that as well. I know, we like to combine quinoa, millets along with rice. But if you are a beginner, start with idli rice and then mix and match according to your preference.
Can I use raw rice like ponni or sona masoori for idli batter? If so, what’s the ratio?
You can, but the ratio is entirely different. For Vinayaka Chaturthi and Gowri Vratham, we offer idli and dosai prepared with raw rice as prasadam. (Didn’t I say idli and dosa are an integral part of our culture.) I have a post coming up on that, but here is the ratio that I follow. I go with 1:1. For 1 cup of raw rice, we need to use 1 cup of urad dal.
Which urad dal to use?
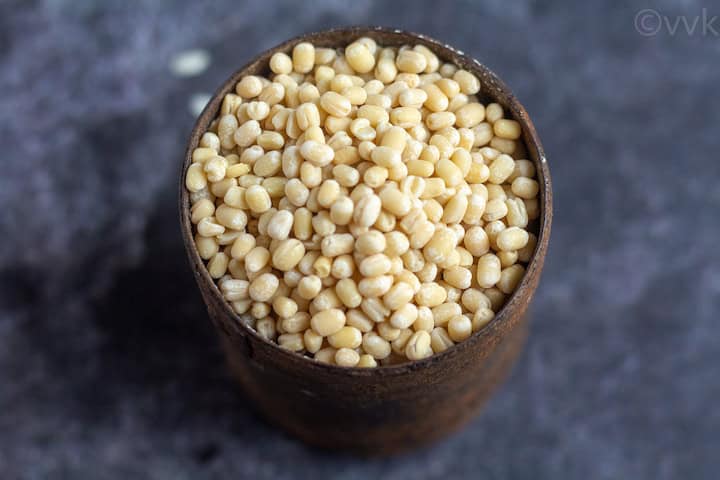
I would recommend the whole urad dal, the white ones ie the skinned whole urad dal. But I have tried with the whole black urad dal as well. The color of the idli will be different, but I never had issues with fermentation. If you are a beginner, go with whole white urad dal, aka known as urad dal gota. Then start experimenting with black urad dal.
What is the idli rice to the urad dal ratio?
I follow a 4:1 ratio, i.e., for 4 cups of idli rice, I add 1 cup of urad dal. I know some families follow a 3:1 (rice to dal) ratio. You can follow what your family follows or go with the universal ratio of 4:1. ( More on troubleshooting tips. )
Why we add fenugreek seeds, and how much should we add?
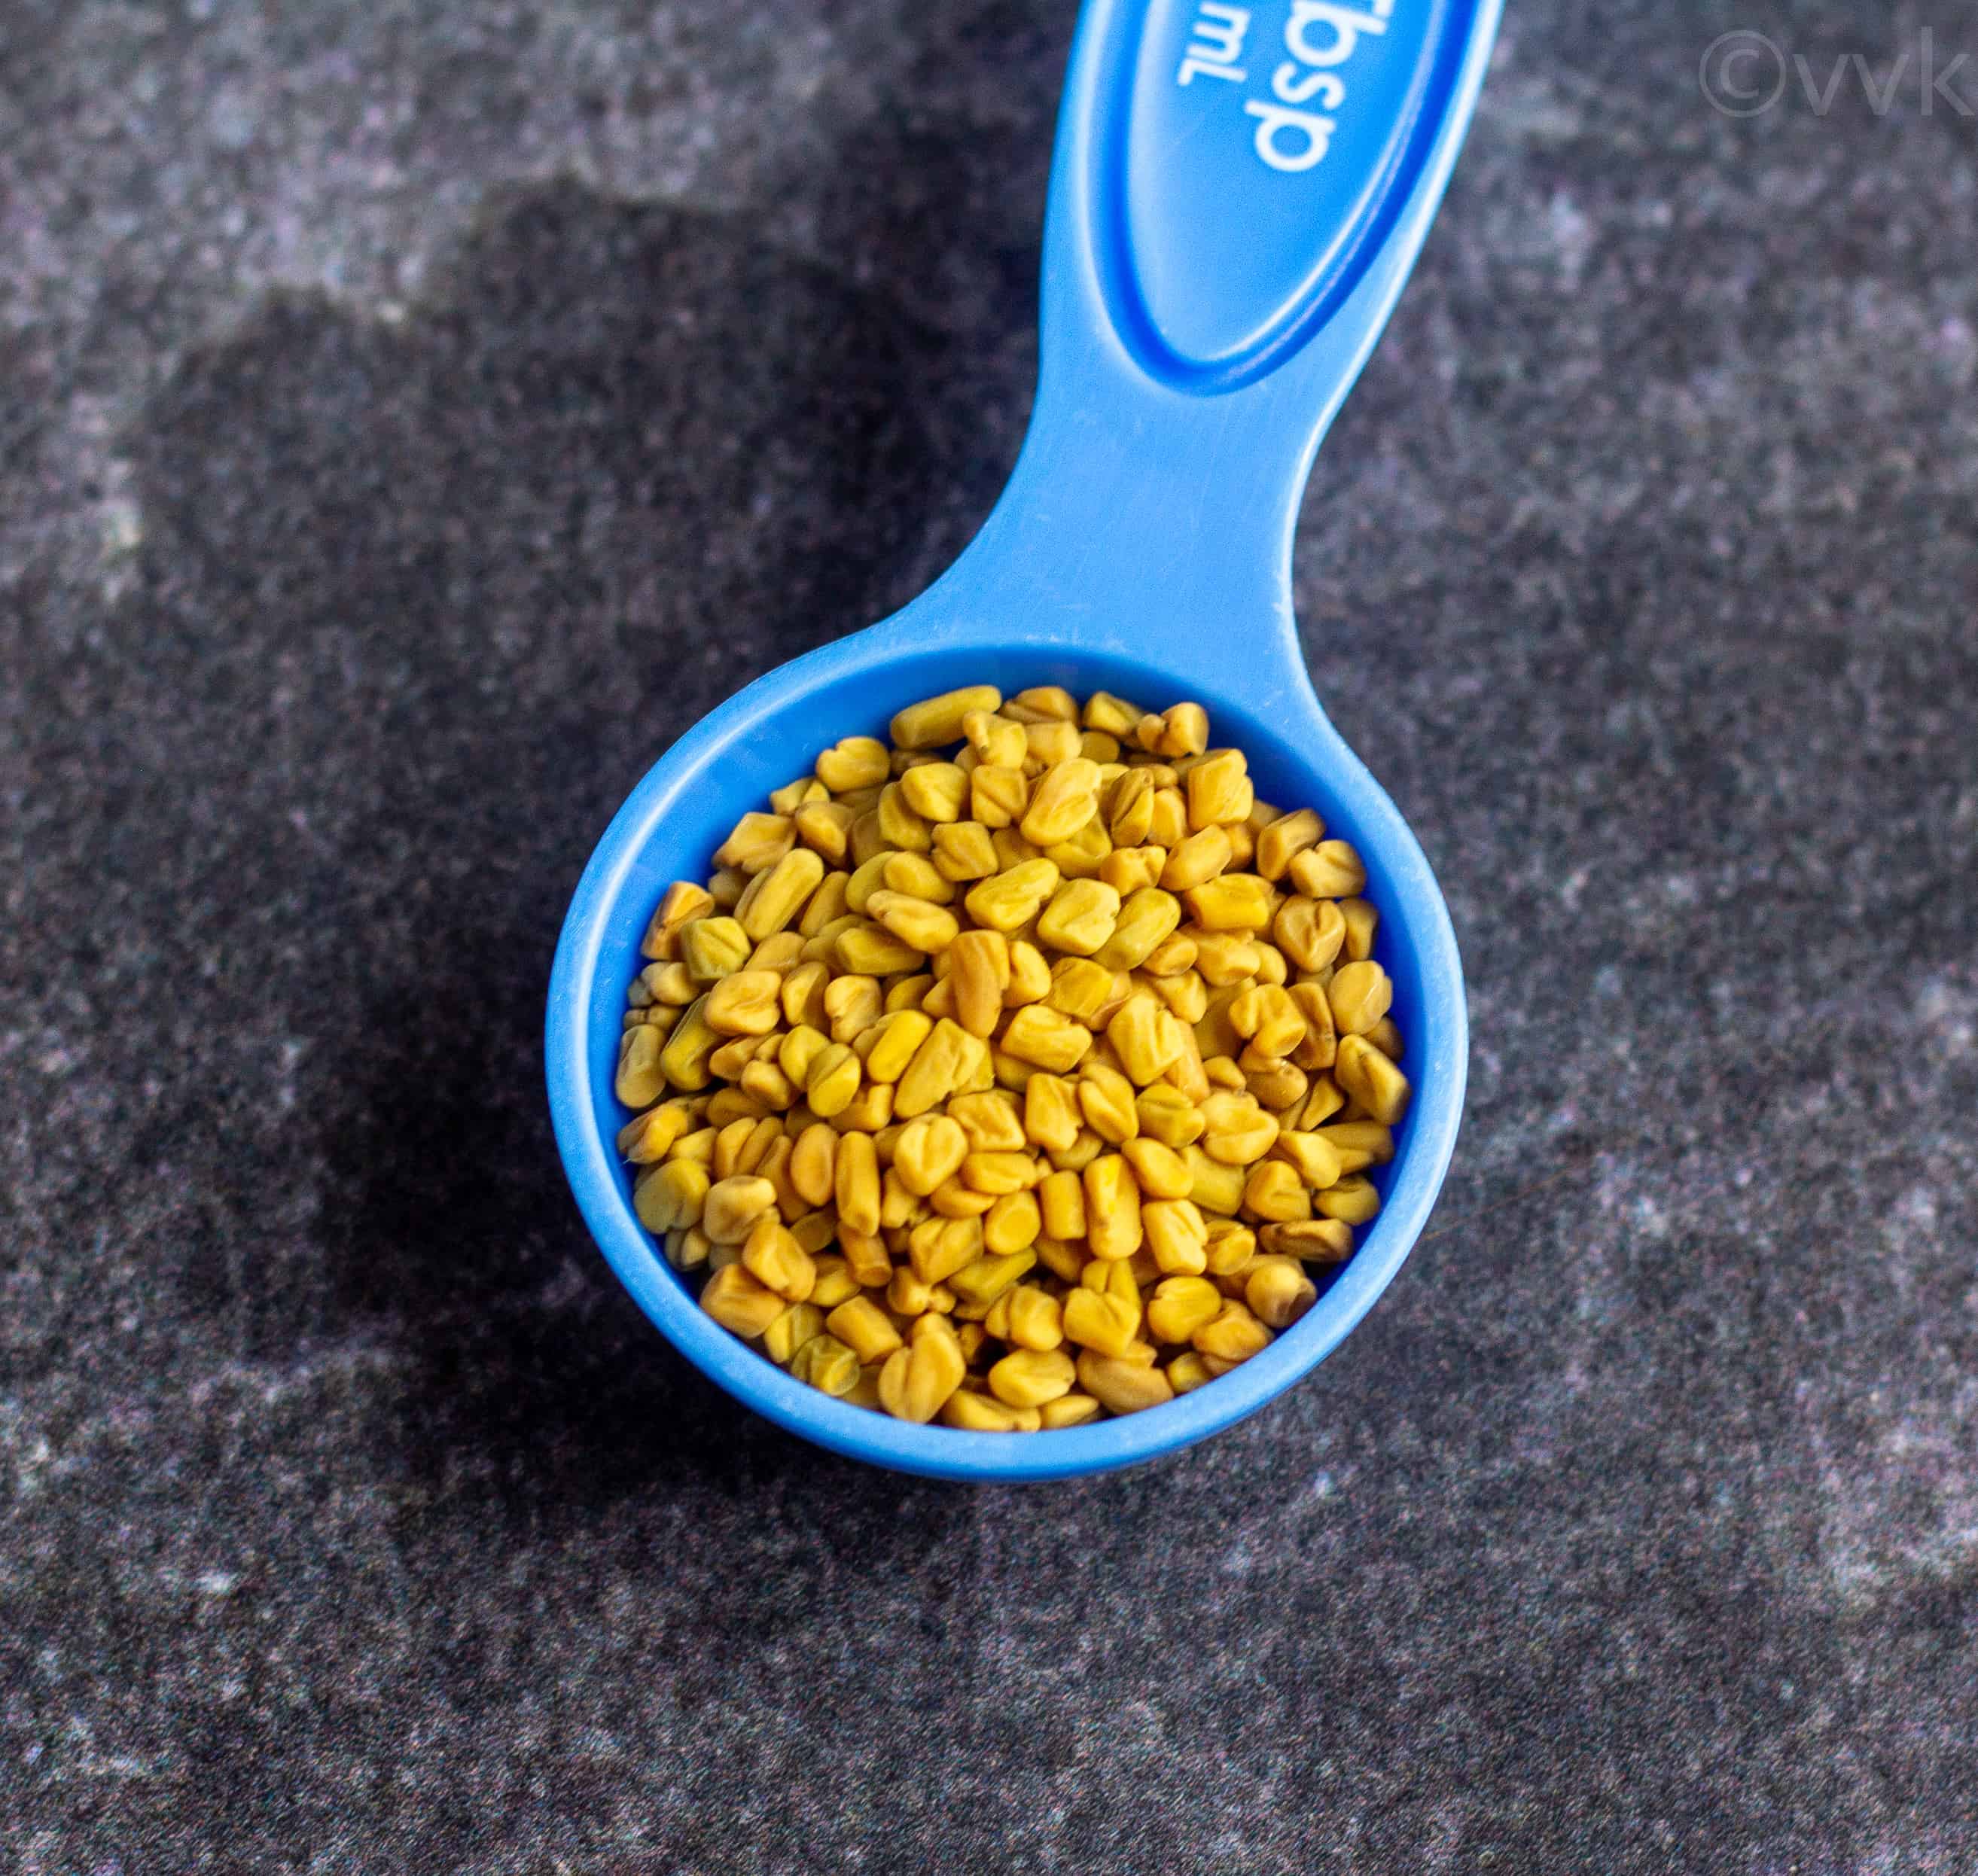
Fenugreek seeds help in fermentation, and it helps to get more volume. Also, it adds a nice flavor. You can add 2 tsps to 3 tsps for this measure.
Should we soak fenugreek separately or with dal or with rice?
Ok, I usually soak it along with urad dal and grind it along with urad dal. It helps with fluffy urad dal batter. Smooth and fluffy urad dal batter directly relates to more volume and good fermentation.
For the past two times, I started soaking it separately and ground it before urad dal. I learned this from Kannama Cook’s blog, and it tremendously improved the volume of the batter. But for this recipe, I went with my way, i.e., soaking and grinding it along with urad dal.
How long to soak the rice and dal?
The purist will say 4 to 6 hours. But I always go for overnight soaking, which is about 12 hours. Somewhere between 6 to 12 hours should be sufficient. :-)
What if I soak the batter for more than 12 hours?
Nothing wrong. This time I purposefully soaked the rice and dal for 14 hours. The idli rice that we got was not of good quality, and the batter was super coarse even after grinding for 45 minutes. So I thought of soaking it for a longer time, but it didn’t help either. The batter and the idli/dosai you see in the pictures are made with this rice.
Did 14 hours of soaking and 45 minutes of grinding the rice affect the fermentation? No, not at all. It fermented well, and in fact, the texture of idli was excellent. The texture of dosa was slightly coarse but no big complaints. And that’s what you see in the picture folks.
Ok, coming to the point, I have soaked up to 15 hours but not more than that. In between, I do change the water.
Can we soak the dal and rice together?
I know I am repeating this, but soaking the dal separately and grinding it helps in the increased volume of the batter. But in our busy lives, we do need to opt for some shortcuts. When I do a 4:1 ratio, I usually soak them separately, but when I do a 2:½ ratio, I soak the rice, dal, and fenugreek together and grind them all together. So far, no issues. As the quantity is different, I am not able to compare the volume of the batter.
Short answer – if you can soak the dal and rice separately, well and good. But soaking and grinding them together is not a sin for sure.
Should we add poha/aval or sago pearls? If so, how much should we add?
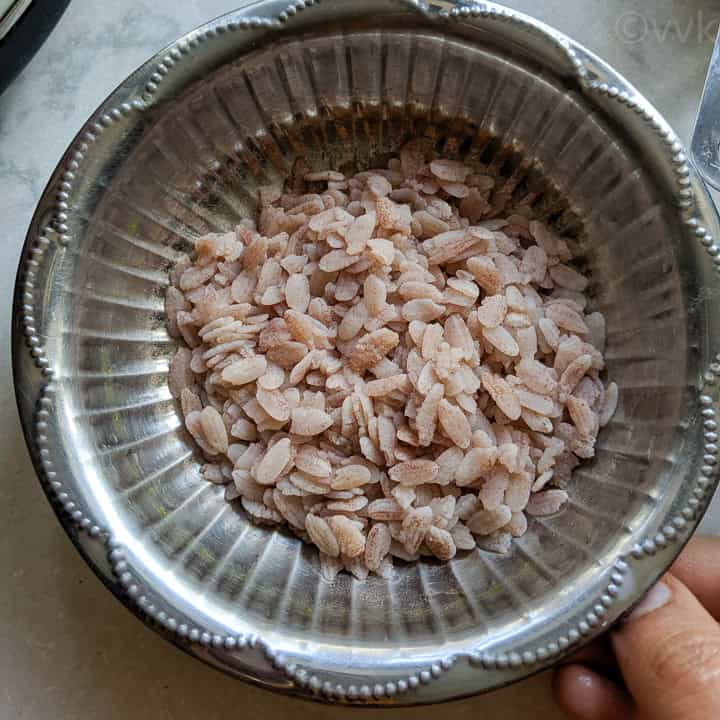
My mom and my MIL don’t add poha or sago pearls. Only after coming to the US, I learned about the addition of poha or sago pearls to the idli-dosa batter.
My MIL is here, and even now, she doesn’t add any poha or sago, but her batter ferments perfectly. I add about ¼ cup of poha, and that’s what I did for this recipe. If you are using sago pearls, ¼ cup should be sufficient as well. Both aids in fermentation and also helps in soft idlis. Adding a handful of either one should help.
How long to soak poha and sago pearls?
I soak poha only for 30 minutes. When I start to grind my urad dal, I soak the poha. I have used thin, thick, medium-thick, and red poha. I have tried adding tapioca or sago pearls only twice. Both the time, I soaked it along with rice. I haven’t experimented much with sago pearls.
What kind of salt to add and when to add?
Again purist says rock salt is the best. But I add my unrefined fine sea salt. I would recommend unprocessed/non-iodized salt for this batter.
Some add after fermentation while some add before fermentation. I add before fermentation. Right after grinding both rice and dal, I mix them both and add salt and remix.
Why some people add salt later is that it inhibits bacterial growth, which in turn slows down the fermentation process. (More on troubleshooting)
Back in my native especially for Tamil Nadu weather, salt helps a lot. I have seen where the batter ferments in less than 5 hours. In that case, salt helps the batter from going bad. That might not be the case for cold places.
How much water should we add while making the batter?
A billion-dollar question, huh? Ok, this water measure is purely for wet grinder folks. For mixer jar or blender, you might need more.
For this 4:1 ratio, you will need 2.75 to 3.5 cups of water while grinding. I usually use between 2.75 to 3.25 cups of water. It all depends on rice and urad dal quality. Be a little cautious while adding water. Once you understand the batter consistency, it will become a breeze. You can eyeball and add water accordingly.
Ok, if you add 4 cups of water, still no issues. But if you add 5 cups of water, then the batter becomes runny. It won’t ferment as expected. But fret not, you don’t need to throw the batter. It’s hard to make idli, but you can very well make dosa. You might have to add some rice flour and semolina, but you don’t need to trash it just because you added more water.
If you add less water, the batter won’t rise much after fermentation. You can thin it down by adding water after fermentation but idlis won’t be as soft. Again dosa will come good. Dosai is more forgiving than idlis. Also, sometimes thick batter won’t ferment properly. After 8 hours, if the batter is not fermented, you can add a little water and try fermenting again.
How long should I grind the dal and rice?
I usually grind urad dal for 30 to 35 minutes. When Urad dal is smooth and fluffy, the batter increases in volume, and you will get soft idlis. Also, while grinding urad dal, do not add all water at once. Sprinkle as needed and grind.
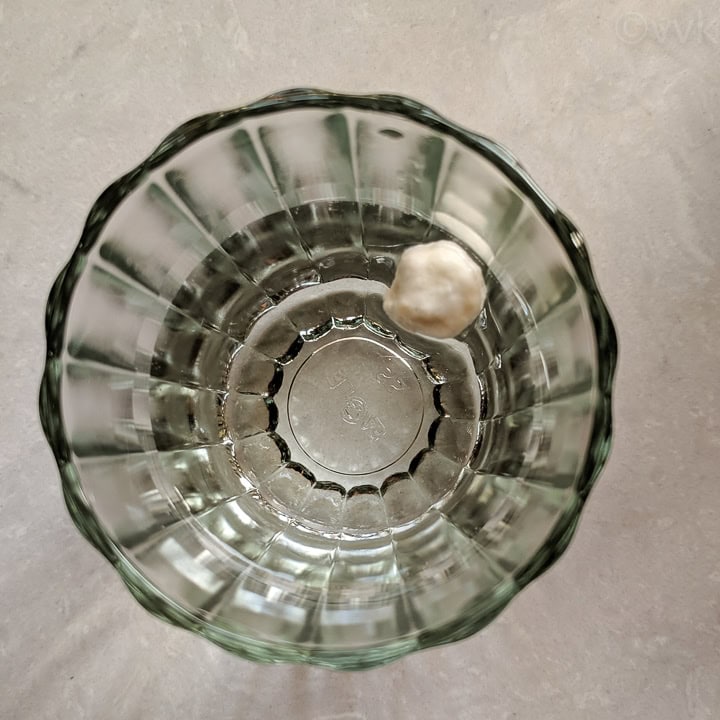
Urad dal consistency check – After grinding the urad dal, take a small piece of the ground dal and drop it into a glass of water. It should float, and it should not spread out or sink. That’s the right consistency.
Now coming to rice, I usually grind rice for 25 to 30 minutes. Sometimes I have to let my grinder run for 40 minutes too.
Rice consistency check– Now rice shouldn’t be as smooth as dal. It should be slightly coarse. I can hear you saying, don’t we need a smooth batter for dosa? Yes, but we are talking about very light coarse consistency (very fine rava), so don’t worry. Dosa will come out well.
Now the next question, what if I grind the rice smoothly. No issues. The texture of the idli will be slightly different; that’s about it. I know many who grind the batter smooth and yet make amazing idlis.
Best way to ferment the idli dosa batter:
First things first, as we all know, batter will rise during fermentation so use a big vessel to ferment. Do not fill up to the brim of the vessel or pot. I have tried fermenting in a stainless steel vessel, plastic containers, and glass bowls. All three have worked but I haven’t done the comparison yet.
The traditional way – If the temperature is warm enough, just keep the batter outside, covered, and it will ferment in 8 hours.
The oven way – When the temperature is fluctuating, I place my batter in the conventional oven with the lights on. In less than 10 hours, it usually ferments. There are times when I had to wait for up to 15 hours, but that’s rare. You don’t need to turn on the oven lights for a full 12 hours. You can turn it on for 5 hours and turn it off. The warmth is sufficient for the batter to ferment.
During late-fall and spring, I keep the batter inside the oven and place a towel on top. And I don’t turn on the oven lights. It works well as well. I don’t preheat the oven.
The Instant Pot Way – These days fermenting the idli dosa batter and proofing the dough for bread in Instant Pot is popular. I tried it a couple of times as well. So you place the ground batter in the inner pot and cover it with a glass lid. And press the yogurt button/normal mode and set the time to 8 hours. Usually, by 8 hours, it should have fermented, but if it doesn’t, then increase the time by 2 hours. Depending upon where you live, the fermentation time will vary.
The 6-quart and 8-quart will be perfect for this measure. I would not recommend using a 3-quart for the idli dosa batter fermentation process.
My choice – I got used to the traditional and oven way of fermenting the batter. I usually split the batter into two and keep it on my window sill during summer months and in the oven with lights on during the winter months. It has always worked for me.
Washing the rice and dal:
I can’t stress enough about this step. Wash your rice and dal until the water becomes clear, and you can see the rice and dal through the water. By washing, you are not only removing the dirt and the arsenic coat, but you also remove the unseen microbes and germs that might hinder the fermentation process. Some suggest not to wash urad dal multiple times. I just wash it thoroughly though.
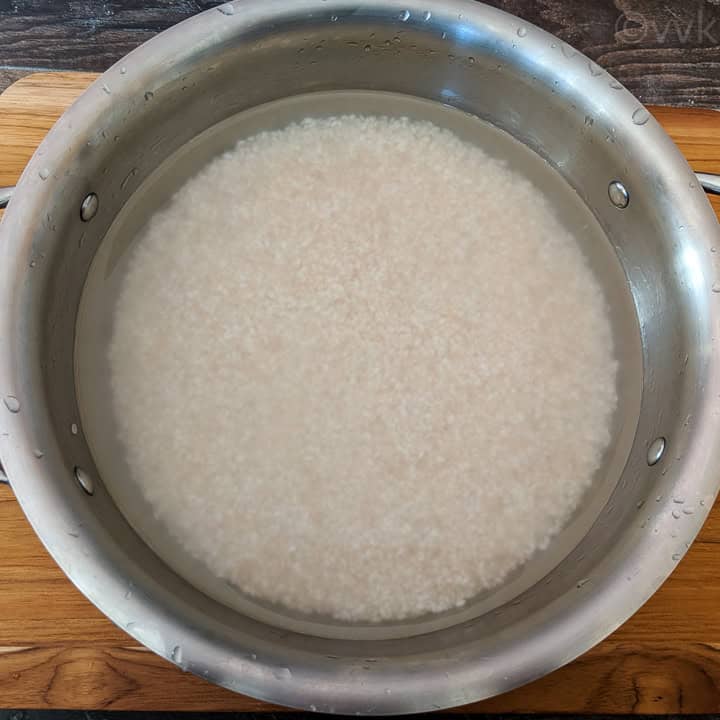
Usually, after 4 to 5 washes, I will be able to see my dal and rice through the water. Depending upon the quality of the rice and dal, the number of washes might differ but make sure you wash them thoroughly.
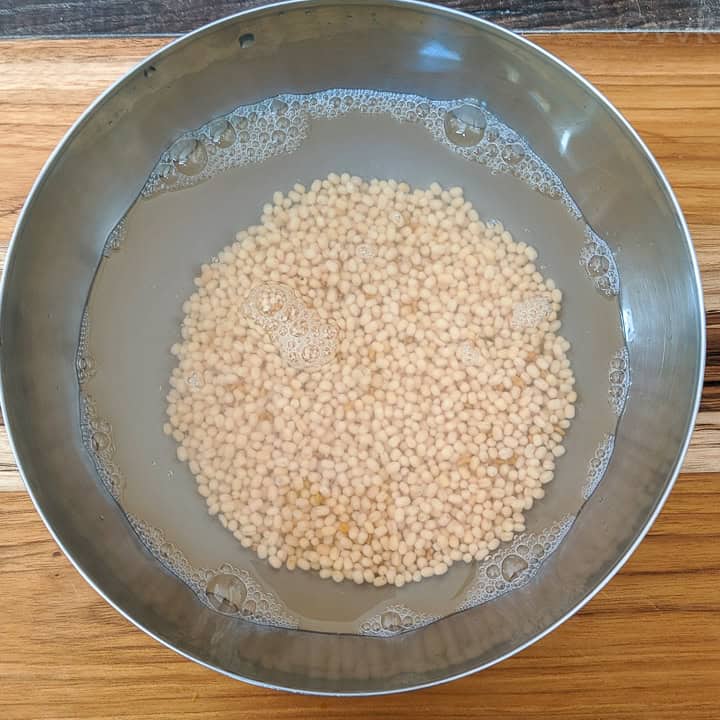
Some people use the water used for soaking to grind the batter. I usually don’t. I use the rice water for making puli mandi (a Chettinadu dish) or use it to wash my hair. (Yes, rice water is really good). I discard the urad dal water. I use that in my garden.
How do I know my batter is fermented?
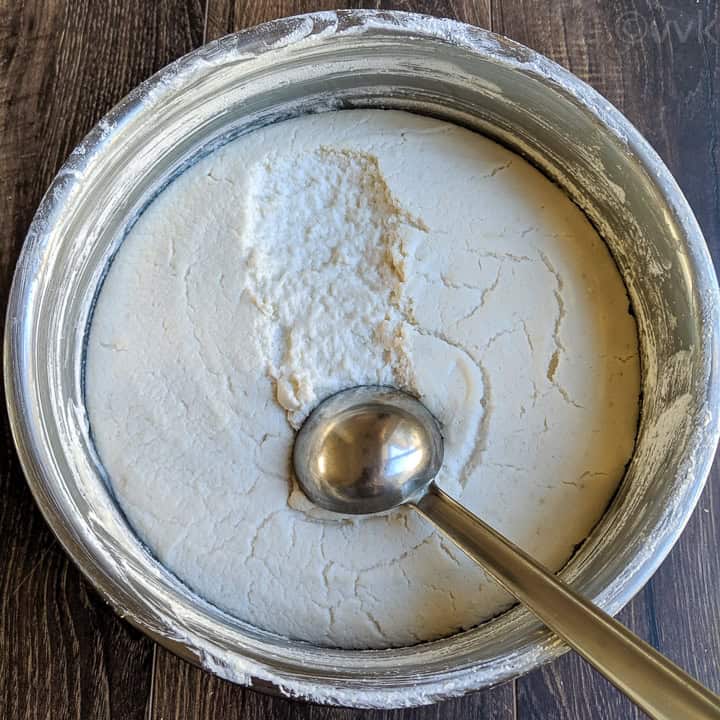
The batter will have a foamy/frothy layer on the top. When you use your spatula and move it you will see the bubbly air pockets. Also, the batter will increase in volume. Now the amount of the increase depends upon the quality of the dal, rice, and also the temperature.
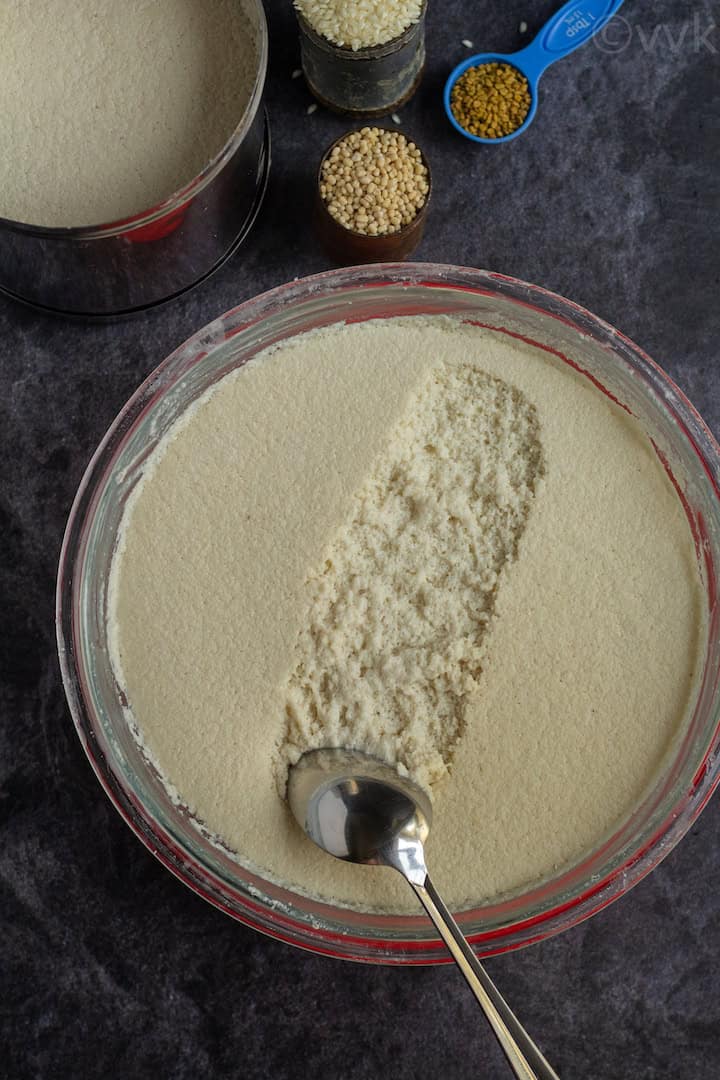
How many idlis and dosai can I make this measure?
With this measure and with a similar amount of rising, you can either make up to 45 to 48 idlis of the size shown in the picture or you can make about 40 dosai.
(PS – The nutrition measure in the recipe card is given for idlis.)
Troubleshooting tips:
As I mentioned before, back in India, living in Tamil Nadu, I took fermentation for granted. After marriage, I came to sunny California, and I had some initial struggle with the fermentation process but then slowly got it. Now I am in the Bay Area which is not cold. I have never stayed in a cold place. Based on my learning from my friends and family who live in cold states here are some of the troubleshooting tips for three main issues-
My idli batter is not fermenting-
Few things that you can try are,
- Add more poha or sago pearls. You can add up to 1 cup.
- Instead of a 4:1 ratio, try a 3:1 ratio. That is for 3 cups of idli rice, try 1 cup of urad dal: more urad and less rice aids in fermentation.
- Make sure you are not using heavily processed salt or iodized salt. It might slow the fermentation process. Add ½ tsp, and after fermentation, add more or as required.
- The batter might be too thick. Try adding less than ¼ cup of water and mix it. The ground batter should be thick but in a slow-pouring consistency.
- Sometimes your batter might need a longer time to ferment. So leave it for 18 hours and see what happens.
- Make sure you wash and rice and dal thoroughly.
- Last but not least, mix the batter with clean hands. The idli dosa batter needs your personal touch and care.
I hope this should help. Try one tip during a trial and see if it works or not. Do not implement all at once, and it becomes hard to understand. Experiment and analyze what worked and what did not, and you will be a pro in preparing the batter in no time.
My idlis are not soft-
If I say this to my mom or MIL, the first question they ask me is – “did you grind urad dal properly”?
- Make sure you grind the dal nice and smooth with sufficient water. You can add up to 1.5 to 1.75 cups of water while grinding urad dal.
- Idli batter should be at room temperature.
- Do not steam the idli for a long time.
- I steam using my idli cooker. I usually steam them for about 10 minutes over medium-low heat. If I am making more than 20 idlis, I might go for up to 15 minutes. After I turn off the heat, I let it sit in the cooker for 3 to 5 minutes and then take it out. After that, I wait for a couple of minutes and then spoon them out. (I will explain different ways to cook idli in another post)
- If the batter is runny, the idlis won’t rise, and it will be flat, and as it cools, it hards up a bit. So add water as needed.
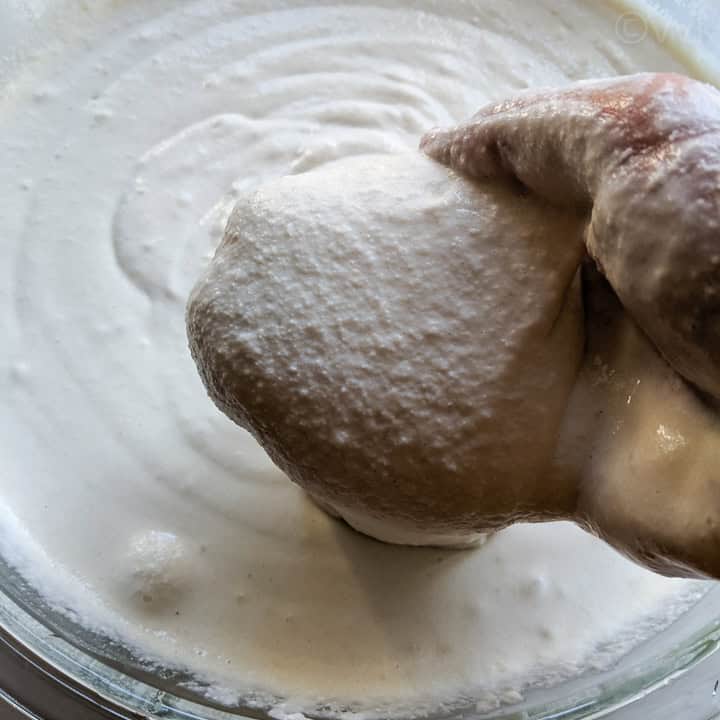
Here is the idli batter consistency after fermentation-
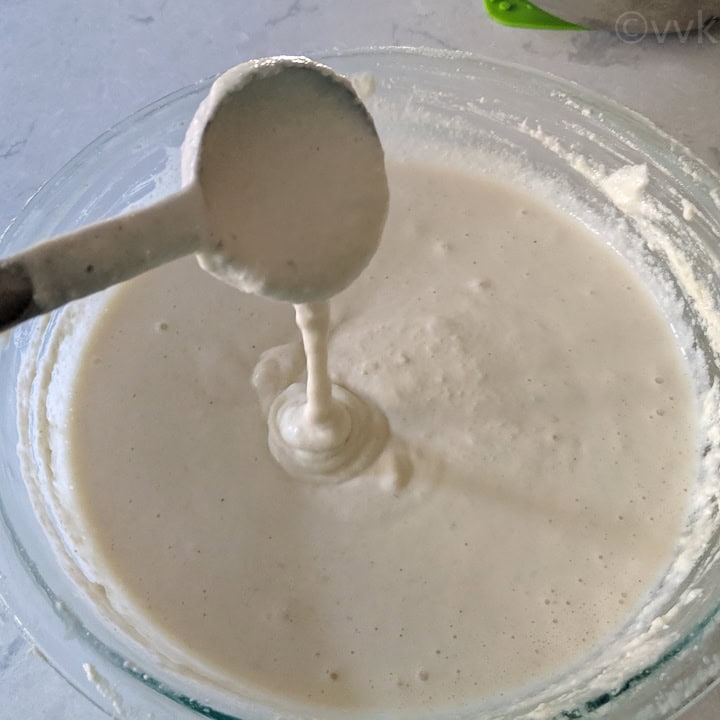
It should be thick and free-flowing. When you pour the batter it will settle down slowly as shown in the picture. Observe the batter as it falls. It will form a layered and will look like a small cone-like icecream batter but it should settle and become flat. It should not stay like icecream. :-)
My dosas are sticking to the pan-
- Make sure you have added sufficient salt to the batter.
- Same as idli, the batter should be at room temperature.
- If you are using a cast-iron pan, make sure it is seasoned well.
- The other reason is that your pan could be super hot. Sprinkle some water and reduce the heat to medium. Always make dosa over medium heat.
- You can also rub the cast-iron pan with a slice of onion or cucumber and then spread the dosa batter. You can check this IG post of mine for making dosa in a cast-iron pan and how I use cucumber to rub the pan.
Here is the dosa batter consistency after fermentation-
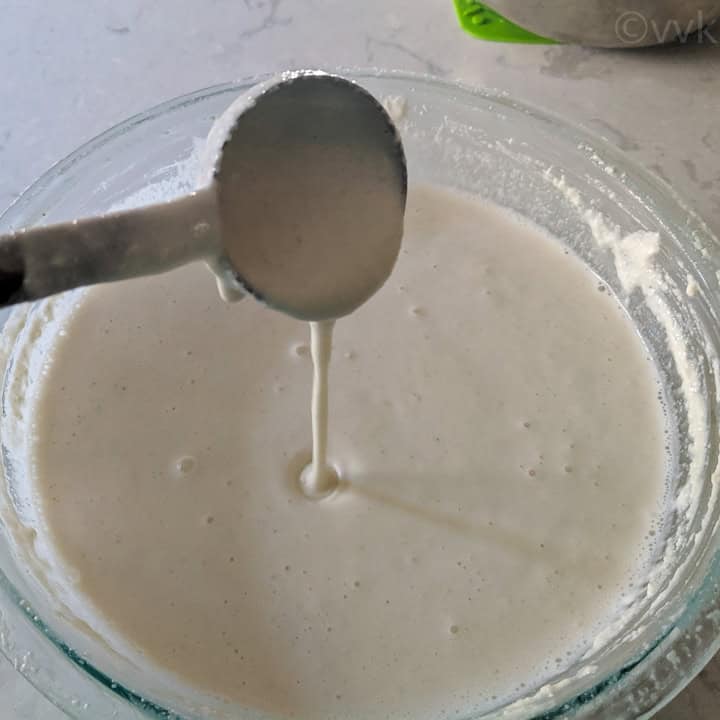
It should be slighter thinner and not as thick as idli batter. Again observe the batter as it falls, it should settle down right away.
Tips to grind the batter in a wet grinder
- Always wet your wet grinder. :-) Before grinding, wash the grinder vessel and the stones.
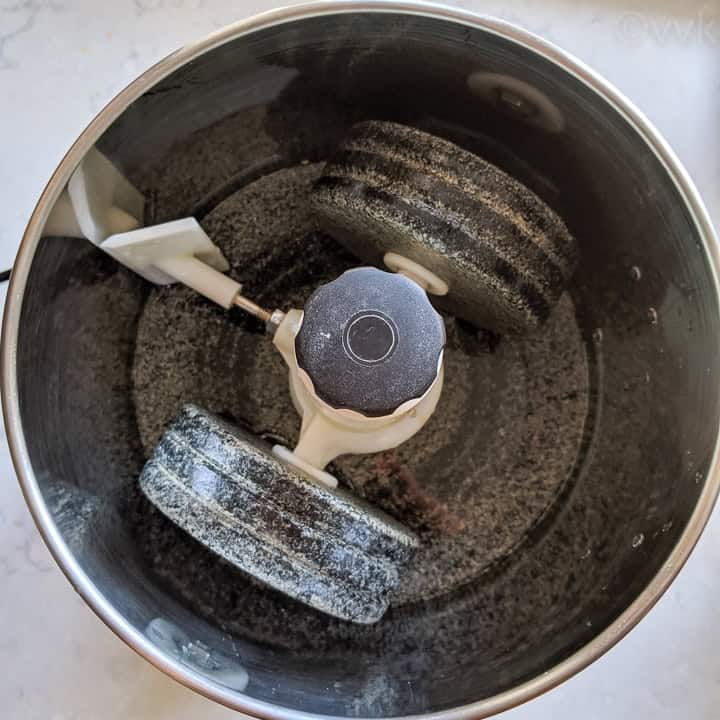
- Add ¼ cup or ½ cup of water first and turn on the grinder. Now add the dal or rice while the motor is running. In this way, the dal or rice doesn’t get stuck to the bottom.
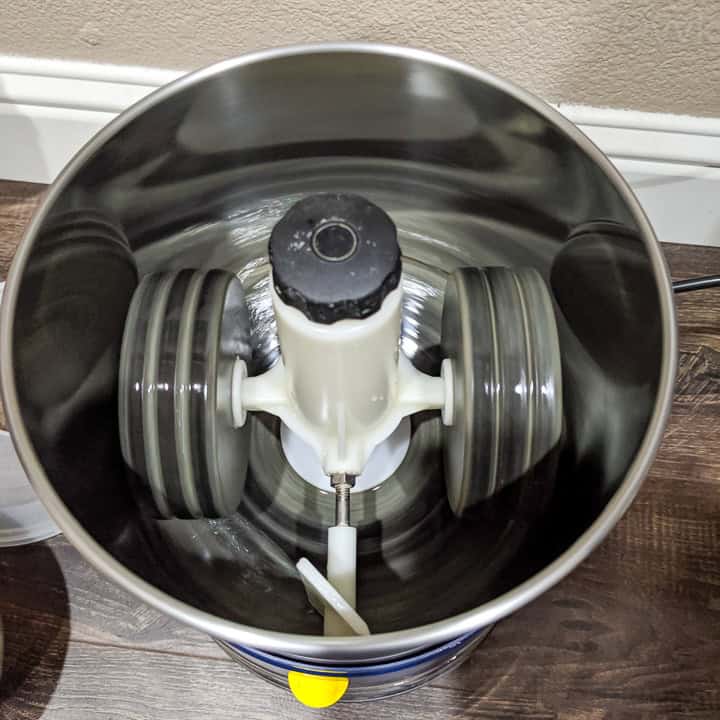
Ufff, I think I have covered all the points. If I have missed any, please let me know in the comment. I will be happy to answer and help you troubleshoot.
Now here is how I grind idli dosa batter in my wet grinder.
How to grind idli dosa batter in a wet grinder & how to ferment the batter-
Ingredients-
- 4 cups idli rice
- 1 cup whole white urad dal
- 1 tbsp fenugreek seeds
- ¼ cup flattened rice, poha/aval (optional)
- 1 tbsp salt
- 3 to 3.5 cups of water to grind, plus to rinse and soak
Wash & soak-
- Wash the urad dal and fenugreek seeds together atleast 4 to 5 times. Similarly, wash the rice 4 to 5 times. Soak the dal and fenugreek together in one bowl and rice in another bowl with sufficient water for 6 to 8 hours. Overnight is fine as well.
- Before grinding, drain the water thoroughly. I don’t use the soaked water for grinding.
Grind the urad dal-
- Soak the poha – before starting to grind the urad dal, wash and soak the poha.
- Now wash the grinder along with the stones and add ¼ cup of water and turn it on. Slowly add the drained urad dal. Sprinkle some water as required and grind it until it is smooth and fluffy for about 30 to 35 minutes. Here is how I add the water in intervals.
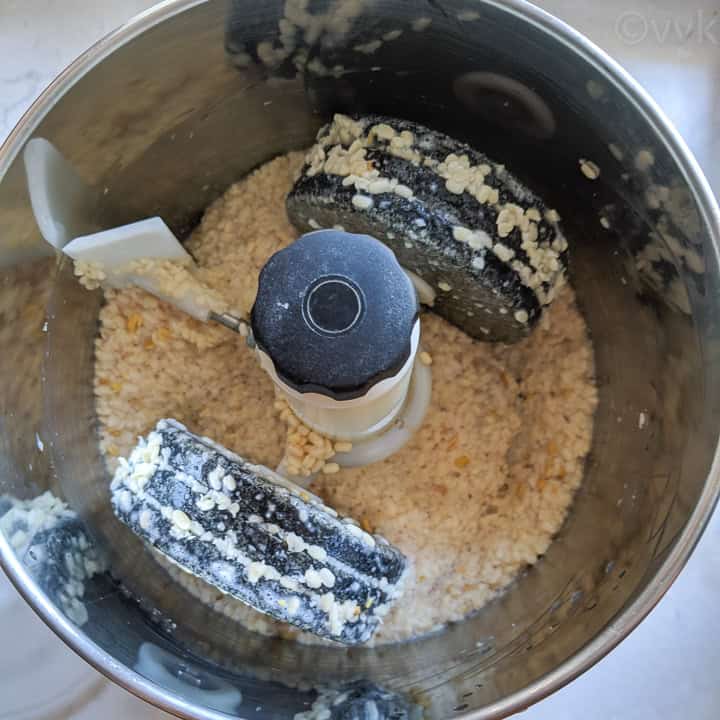
- After 5 minutes of grinding, I added about ¼ more cup of water.
- After that, I drizzled about 2 tbsp of water every 5 to 7 minutes. Overall I added about 1.25 cups of water this time while grinding the urad dal.
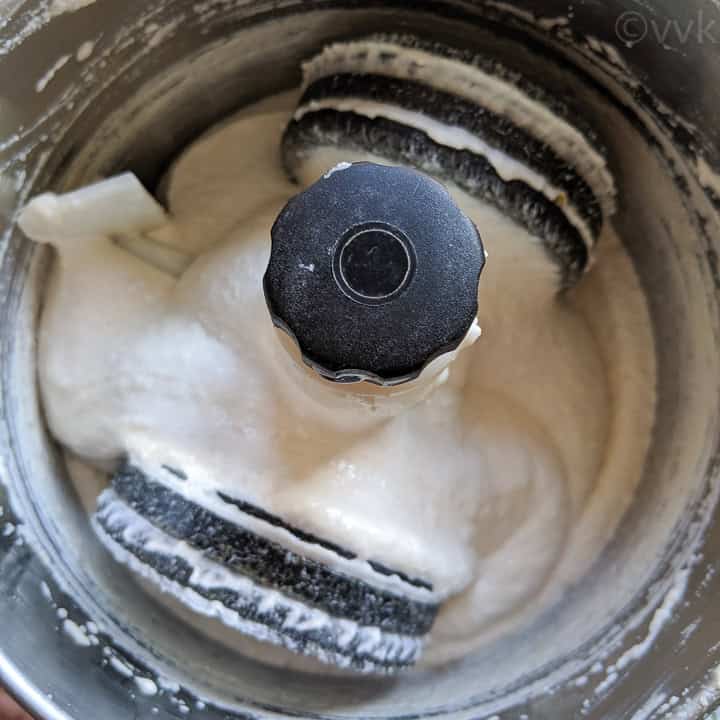
- Now turn off the grinder and remove the dal batter into a bowl. Don’t need to clean the wet-grinder now.
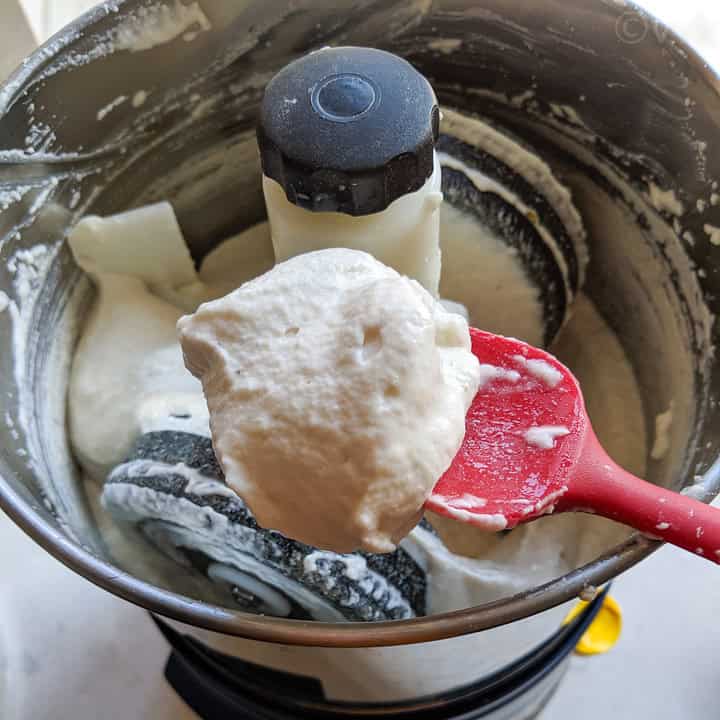
Grind the rice and poha-
- Add ¼ cup of water and start the wet-grinder. Slowly add the drained rice. Let it run for 5 minutes.
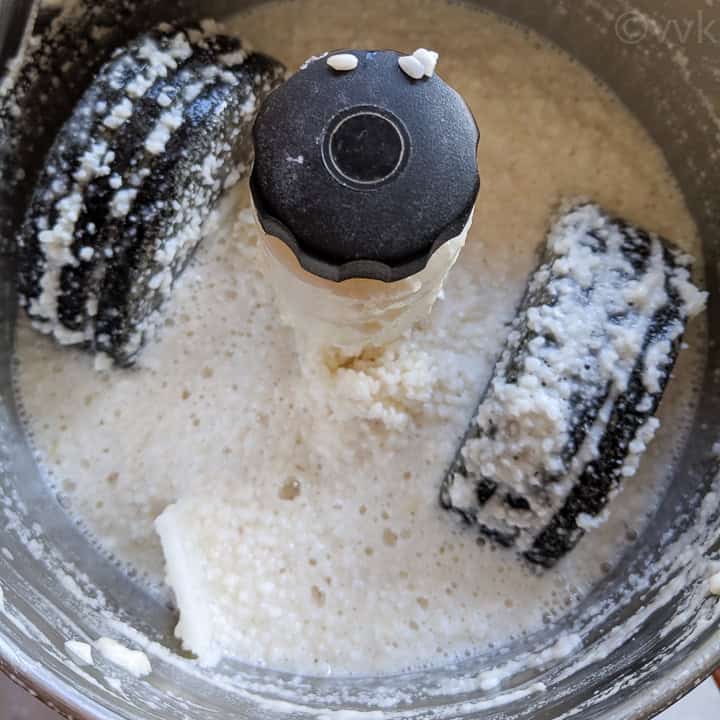
- After 5 mts, add the drained poha. Add ½ more cup of water and grind the rice until it is smooth but slightly coarse for about 25 to 30 minutes. In between, add water as required.
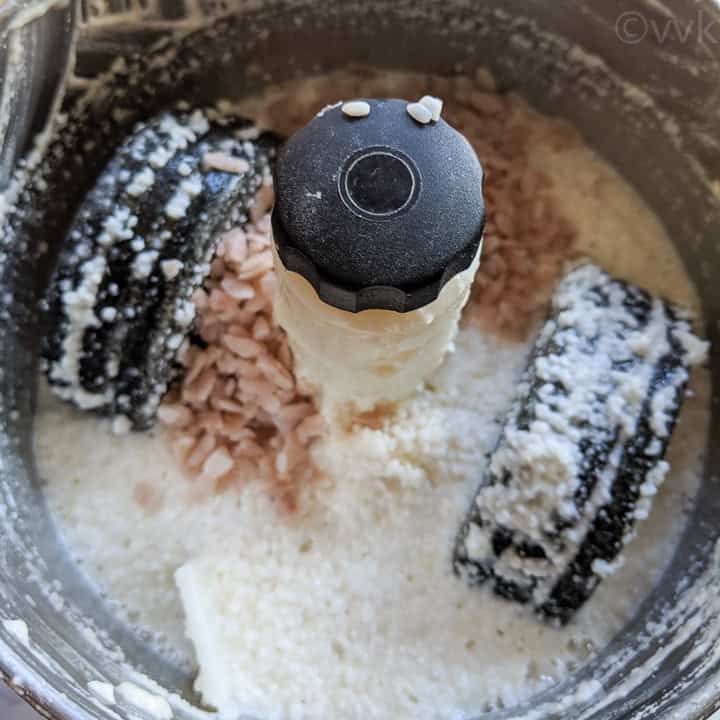
- Again you don’t need to add all water at once. I added about 1.25 cups + a tbsp of water for this batch.
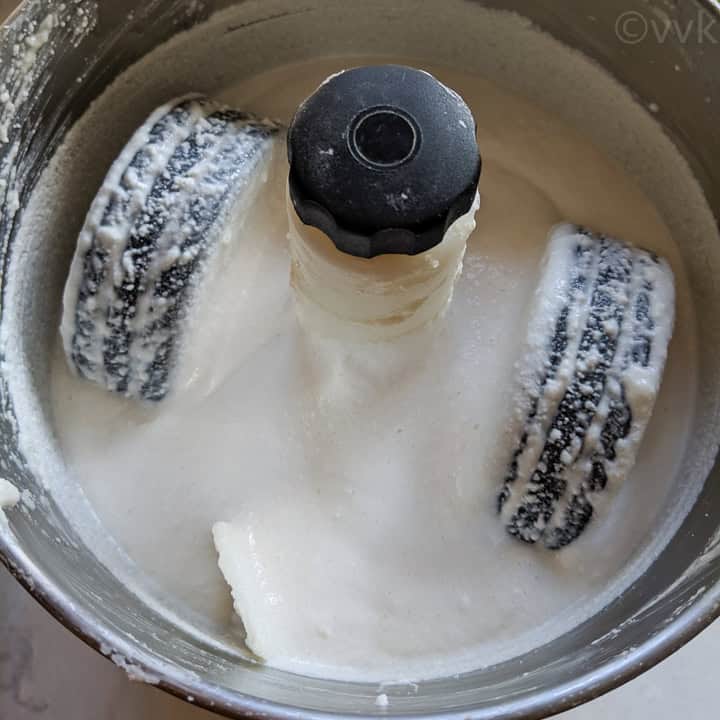
Mix the dal and rice batter and add salt-
- Now take out the rice batter. I add ¼ to ⅓ more cup of water to the grinder and rinse it and add it to the batter mix. (You see, no wastage.) If you notice, I would have used 2.5 cups plus ⅓ cup of water for this batch. As I mentioned before, usually, you need about 2.5 to 3.5 cups. You don’t need to water exactly at the intervals that I mentioned. Understand the consistency and go with your instinct.
- Mix the dal batter and rice batter thoroughly. Mix it from the bottom with a clean hand. We don’t want the dal batter and rice batter to be separate. Incorporate it well. Then add the salt and gently mix. You should have a thick but a slow free-flowing batter.
As I mentioned before, this particular batch of idli rice is not that great. I had to grind the rice for more than 45 minutes to get this consistency. It’s still on the coarse side.
Ferment the batter-
- At this stage, I separate the batter into two bowls. Do not fill the batter till the brim of the vessel. Now ferment it in your preferred way.
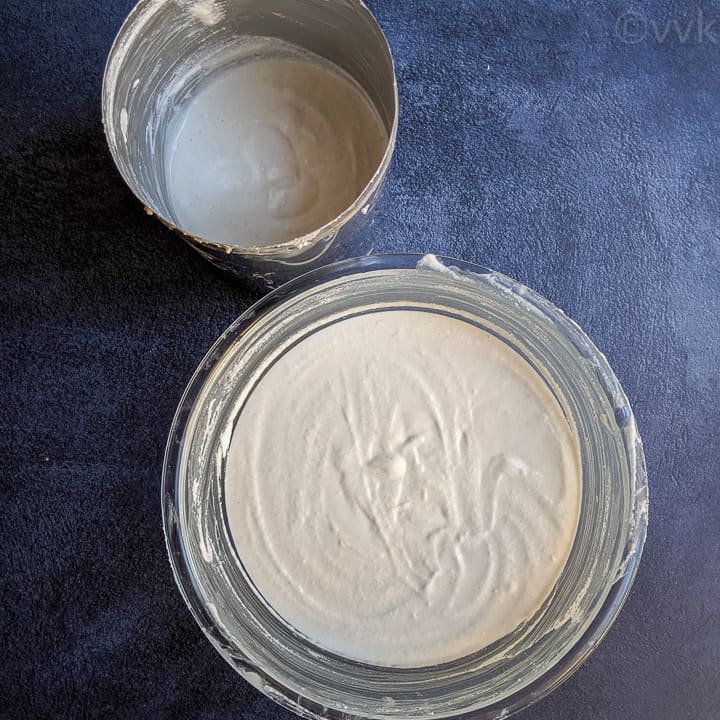
- I kept this inside my oven with the lights on for about 8 to 10 hours.
- Fermenting the idli batter in Instant Pot – If you are going to use IP for fermenting, I would recommend transferring the urad dal and rice batter directly to the inner pot of IP from the grinder.
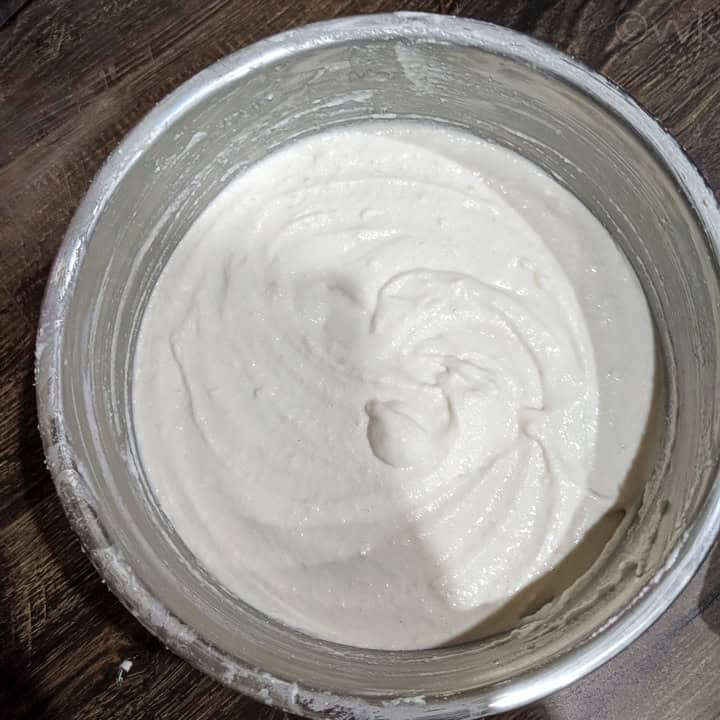
- Mix and add salt and place the inner pot inside the IP. Close it with the glass lid.
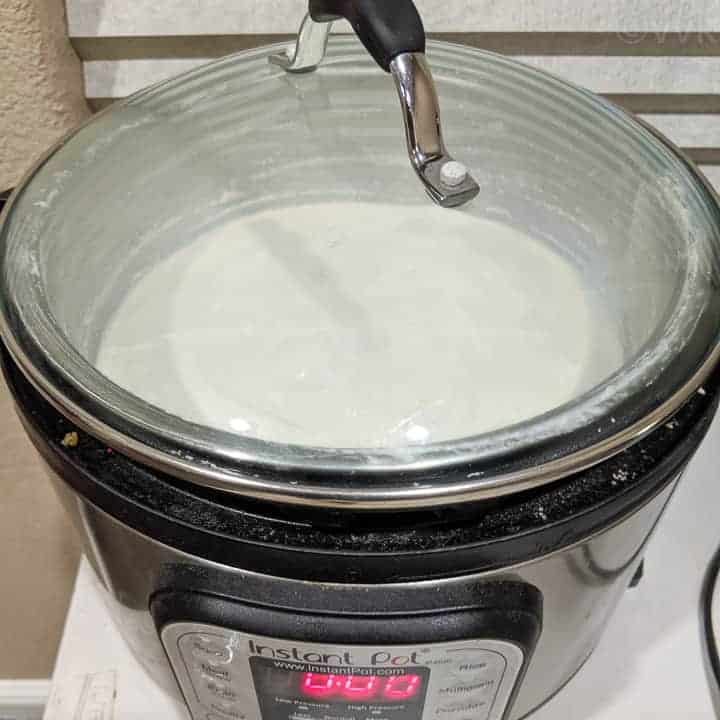
- Press the yogurt button and set it to 8 to 10 hours. Here it is after fermentation.
Store the batter-
- After fermentation, refrigerate the batter, and it stays well for up to 1 week.
Making idlis-
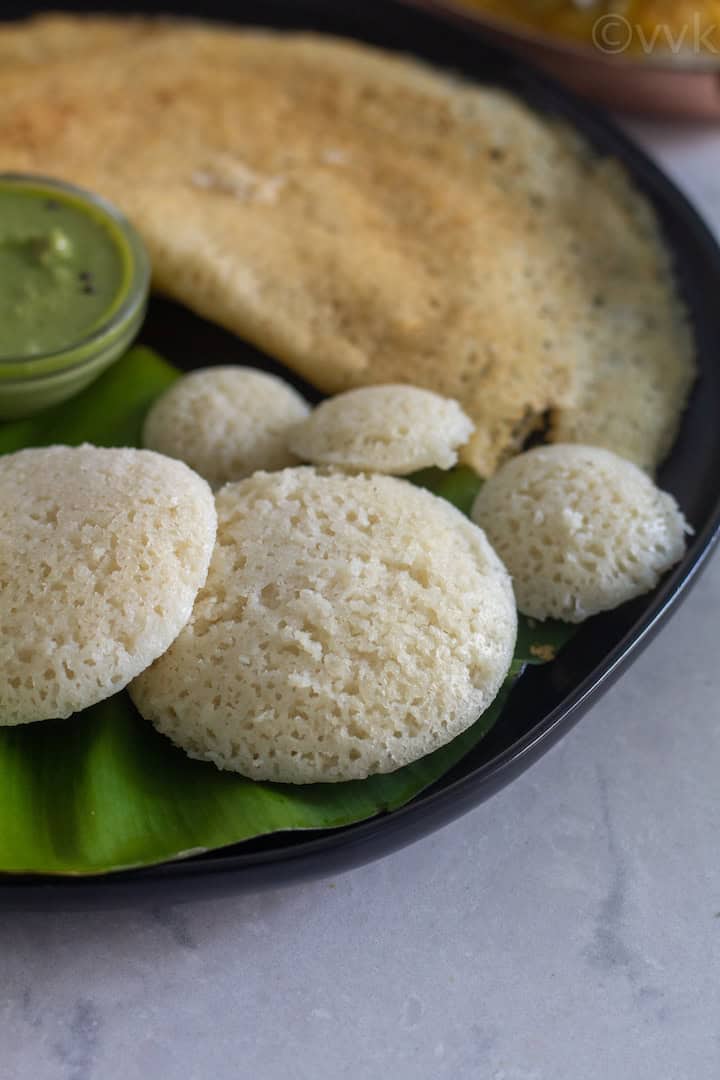
- Mix the fermented batter and see the consistency of it. I have explained it in the post. Add about 1 cup of water to the idli cooker and let it come to a boil. Meanwhile, grease the idli plates with gingelly oil and pour the idli batter. Steam it for 10 minutes over medium heat and turn off the heat. Let it sit for 3 to 5 minutes inside and then remove the idli plates. Let it cool a bit for a couple of minutes before you spoon out. Serve hot with sambar, coconut chutney, tomato chutney, or peanut chutney.
Making dosai-
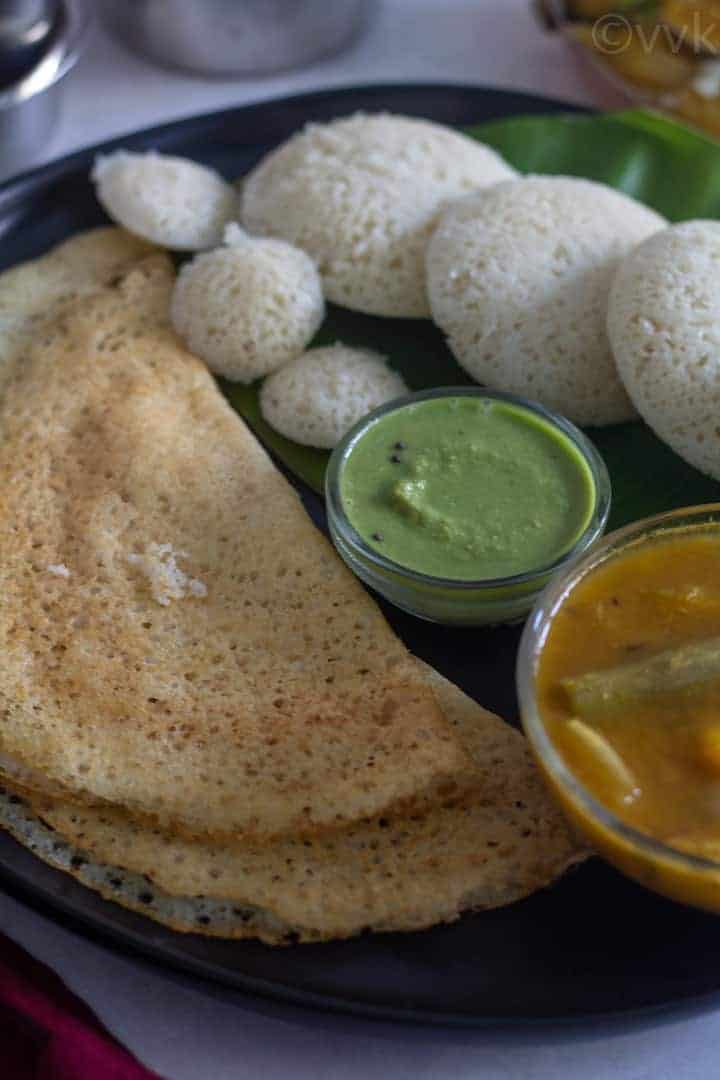
- The batter should be slightly thinner than the idli batter.
- Heat a well seasoned cast-iron pan, and when it is hot, reduce the heat to medium.
- Take a spoon/ladle full of batter and pour it on the pan. Spread it evening from the center towards the edges. Spread some oil around the edges; ½ tsp should be sufficient. Allow it to cook. Usually, it takes about 45 to 50 seconds. Now using a flat spatula, loosen the edges and flip the dosa. Cook for 15 to 20 seconds and remove it from the pan.
You can check different varieties of dosa in my dosa category and also check out the side dishes for idli and dosa.
Recipe Notes-
- As I have explained everything on the dos and don’ts, I don’t want to repeat it. Please check them all in the post.
- I have given the rough estimate of water that is required for this ratio and also what I used for this batch. Be a little cautious while adding water.
- If you are looking for rice alternatives, check our millet idli-dosa batter.
PS: Follow me on Instagram or join my Facebook Group for more gardening and recipe updates. If you try this homemade idli dosa batter recipe, please don’t forget to comment and rate this recipe. If you have any questions, please leave a comment, and I will get to it asap. Make sure to follow me on my Pinterest for more healthy and delicious ideas!
📖 Recipe
Idli – Dosa Batter Recipe
Equipment
- Wet Grinder
Ingredients
Measurement details – 1 cup = 240 ml; 1 tsp = 5ml and 1 tbsp=15ml
- 4 cups idli rice
- 1 cup whole white urad dal urad dal gota
- 1 tbsp fenugreek seeds
- ¼ cup flattened rice optional
- 1 tbsp salt
- 3 to 3.5 cups water to grind plus to rinse and soak
Instructions
- Wash the urad dal and fenugreek seeds together for atleast 4 to 5 times. Similarly, wash the rice for 4 to 5 times. Soak the dal and fenugreek together in one bowl and rice in another bowl with sufficient water for 6 to 8 hours. Overnight is fine as well.
- Before grinding, drain the water thoroughly. I don’t use the soaked water for grinding.
- Soak the poha – before starting to grind the urad dal, wash and soak the poha.
- Now wash the grinder along with the stones and add ¼ cup of water and turn it on. Slowly add the drained urad dal. Sprinkle some water as required and grind it until it is smooth and fluffy for about 30 to 35 minutes. Here is how I add the water in intervals.
- After 5 minutes of grinding, I added about ¼ more cup of water.
- After that, I drizzled about 2 tbsp of water every 5 to 7 minutes. Overall I added about 1.25 cups of water while grinding the urad dal.
- Now turn off the grinder and remove the dal batter into a bowl. Don’t need to clean the wet-grinder now.
- Add ¼ cup of water and start the wet-grinder. Slowly add the drained rice. Let it run for 5 minutes and now add the drained poha. Add ½ more cup of water and grind the rice until it is smooth but slightly coarse for about 25 to 30 minutes. In between, add water as required.
- Again you don’t need to add all water at once. I added about 1.25 cups of water for this batch.
- Mix the dal and rice batter and add salt-
- Now take out the rice batter. I usually add ¼ to ⅓ more cup of water to the grinder and rinse it and add it to the batter mix. If you notice, I would have used 2.5 cups plus ¼ cup of water for this batch. As I mentioned before, usually, you need about 2.5 to 3.5 cups. You don’t need to water exactly at the intervals that I mentioned. You go with your instinct.
- Mix the dal batter and rice batter thoroughly. Mix it from the bottom with a clean hand. We don’t want the dal batter and rice batter to be separate. Incorporate it well. Then add the salt and gently mix. You have a thick but free-flowing batter.
- At this stage, I separate the batter into two bowls. Now ferment it in your preferred way.
- I kept this inside my oven with the lights on for about 8 to 10 hours.
- If you are going to use IP for fermenting, I would recommend transferring the urad dal and rice batter directly to the inner pot of IP from the grinder. Mix and add salt and place the inner pot inside the IP. Close it with the glass lid.
- Press the yogurt button and set it to 8 to 10 hours. Here it is after fermentation.
- After fermentation, refrigerate the batter, and it stays well for up to 1 week.
- Mix the fermented batter and see the consistency of it. I have explained it in the post. Add about 1 cup of water to the idli cooker and let it come to a boil. Meanwhile, grease the idli plates with gingelly oil and pour the idli batter. Steam it for 10 minutes over medium heat and turn off the heat. Let it sit for 3 to 5 minutes inside and then remove the idli plates. Let it cool a bit for a couple of minutes before you spoon out. Serve hot with sambar, chutney.
- The batter should be slightly thinner than idli batter.
- Heat a well seasoned cast-iron pan, and when it is hot, reduce the heat to medium.
- Take a spoon/ladle full of batter and pour it on the pan. Spread it evening from the center towards the edges. Spread some oil around the edges; ½ tsp should be sufficient. Allow it to cook. Usually, it takes about 45 to 50 seconds. Now using a flat spatula, loosen the edges and flip the dosa. Cook for 15 to 20 seconds and remove it from the pan.
- I will soon post about cooking idlis and making dosa in a separate post.
Notes
- As I have explained everything on the dos and don’ts, I don’t want to repeat it. Please check them all in the post.
- I have given the rough estimate of water and also what I used for this measure. Be cautious while adding water.
Nutrition
I am not a nutritionist. The nutritional information is provided as a courtesy and is an estimate only. It varies depending upon the product types or brands.



Hi Srividya,
I tried fermenting the batter in the insta pot using the yogurt mode for 12 hours! But the only problem was that some of the batter was stuck to the bottom of the inner pot! I had to scrape to get it out! Don’t know if my batter needed more water! Please advise
Sorry for the late reply. It shouldn’t stick to the bottom. Is there any other high/more setting for yogurt in your IP? If so reduce it.
Hi Srividya (my sister’s namesake), great effort. I’ve been trying to perfect my idlis but gave up and now buying Vijay Batter from the store. Consistency and fermentation issues, I live in NJ and right now temp in the 30s going into the 20s this week. I use the same grinde rin your pic and I belive I have the same IP you have.
One issue I’ve constantly noticed is after fermentation the batter seems to develop a skin bit like the yoghurt aadai. This seems to prevent increase in volume and messes up everything. If I discard the skin I’m left with lot less batter etc.,.
2 Qs – 1. My IP has 3 yoghurt settings – High pressure, low pressure and no pressure. Which one should I use? 2. How do I troubleshoot the skin issue?
Thanks
Sriram
Hi Sriram, Have you tried fermenting the batter keeping it in the oven with the oven lights on? When we ferment for a longer time in cold weather, the light yellow skin is normal. When I ferment for more than 16 hours, I get that too. But as long as it doesn’t smell bad, I usually mix it with the batter. With yogurt mode, I don’t adjust any pressure settings. A couple of things you can do is – try 3:1 ratio. 3 cups of rice and 1 cup of urad dal. Or if you are using 4:1 ratio, add more fenugreek you can add up to 1 tbsp. Grind the fenugreek with water first and then add urad dal and grind. The volume of urad dal will be more and that should help with faster fermentation. Also, try adjusting the salt amount. I hope these points help. Thanks
Hello – thank you for explaining it all in so much detail. I have rice flour and wanted to use that instead of soaked rice, with soaked urad dal. Can you help with what the rice flour: urad dal ratio should be?
Thanks a lot. And sorry for the delayed reply. With store-bought rice flour, it’s a little tricky to measure also it’s raw rice flour. Do you have urad dal flour? IF so you can mix 1 cup of rice flour and 1/2 cup urad dal flour and try. Sorry I have never tried the combo of rice flour with soaked urad dal.
Hi Vidya ,
I recently had made the batter and let it ferment in my IP for around 10 hrs. But never got the bubbly top. Is it possible that the batter was too thin? It was a nice flowy consistency and also I had put the regular lid for IP rather than a glass one. Does that have to do anything with the fermentation process? Also, do we reduce the fenugreek accordingly as we reduce the batter?
You won’t get bubbly top only when the batter is too thin. My guess is your batter might need more time. Sometimes the batter ferments only after 15 hours. So next wait for at least 15 hours. The lid shouldn’t be a problem. Try removing the sealing ring though. Fenugreek is completely optional and it’s according to your preference. For a 4:1 ratio, you can add even 1 tsp or 2 tsp. If you are doing a 2:1/2 ratio, 1 tsp or 1/2 tsp should be sufficient. I hope this helps.