

Easy homemade paneer/chhena recipe without any additives and with just two ingredients – milk and vinegar! Check out how to boil milk on stove-top and Instant Pot for the paneer with all the tips and tricks.

What is paneer-
Paneer – popularly known as Indian cottage cheese, is a fresh cheese that is quite popular in India. Paneer gravies and paneer based sweets are quite popular across India. It’s a non-melting cheese prepared by curdling the milk with vinegar. With paneer, you don’t need to worry about animal enzymes or rennet.
As I mentioned before, paneer became a common ingredient in our household only after coming to the US. My dad used to get store-bought rasgullas, but we never made homemade paneer nor bought it from stores. So when after coming to the US, I was so amazed by the fact that I could get paneer readily and learned a lot of dishes from our friend.
And when I tried making paneer on my own, my joy knew no bounds.
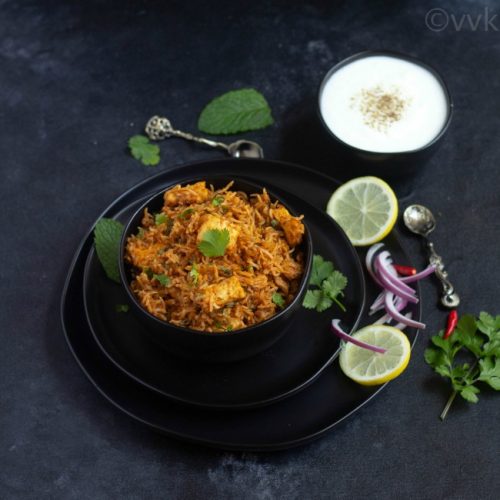
Preparing fresh paneer at home is super simple. While I buy store-bought ones for other paneer curries, I always prefer fresh paneer for my bhurji, paratha, and many other milk sweets like rasgulla.
You don’t need any unique ingredients or equipment for this homemade paneer. All you need is some milk, acidic liquid like vinegar or lemon. Cheesecloth or cotton cloth to drain the when water. That’s it.
While everyone suggests using whole milk, I usually use reduced-fat milk, the 2% one, and I haven’t had any issues. I get a fair amount of paneer that is soft. I use it for my bhurji, paratha, and paneer gravies. For more soft and more paneer quantity, you can use whole milk.
So before getting into details, let’s see what’s paneer and the process behind it.
How paneer is made-
There are two kinds of protein – whey protein and casein protein. We separate the casein and whey protein during the paneer making process and collect the casein protein known as milk curds. Then, we press the curds and make the paneer.
When the milk boils, and when we add vinegar, pH drops, and it becomes more acidic, the protein (casein) molecules attract one another and become the curds that float in a solution of translucent whey. This clumping reaction happens more swiftly at warmer temperatures than it does at cold temperatures. So it is necessary to bring milk to a good boil.
Note – You don’t need an Instant Pot to boil the milk. A regular saucepan will work. But with Instant Pot, you don’t need to supervise and worry if the milk will overflow. That’s the most significant advantage.
Recipes with homemade paneer-

How to prepare fresh homemade paneer/chhena-
Boiling milk on stove-top-
- In a saucepan, add the milk and bring it to a boil.
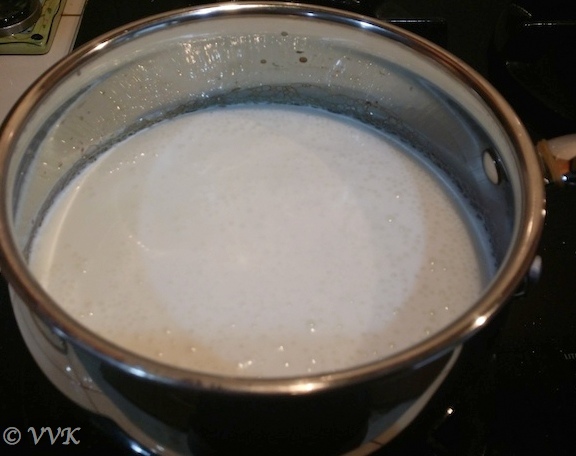
- When the froth forms on the top, turn off the heat and let the milk rest for a minute.
- Add the vinegar and mix well. The milk will start to curdle. Mix again. If the curdling is not happening, add a little more vinegar.
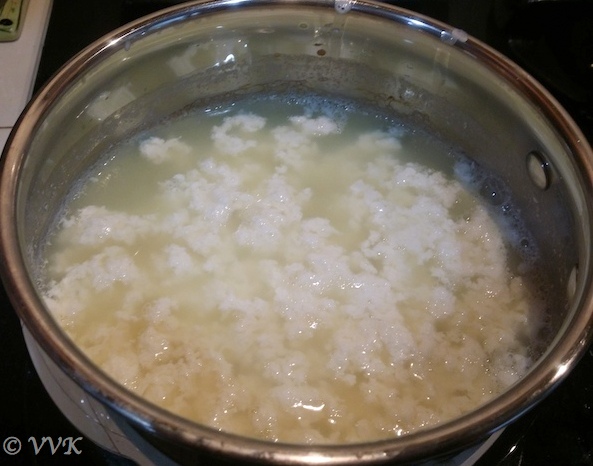
- Let it rest for 10 minutes. Slowly the milk will start to curdle, and you can see the curds.
Boiling milk on Instant Pot-
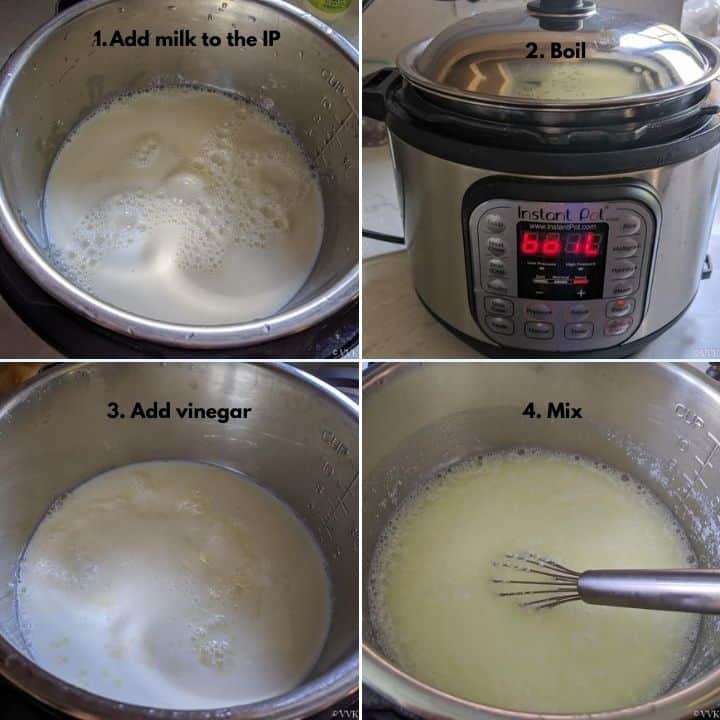
- Add the milk to the inner pot of the instant pot and press the yogurt button. The display should show “boil,” and it will blink. Leave it for a few seconds, and it will beep and stay in the boil mode.
- Cover the IP with lid, and in 20 to 24 minutes, when the boiling is complete, Instant Pot will beep, and it will go to the “Yogurt” mode automatically. Now turn off the IP and remove the lid.
- Add the vinegar and mix well. The milk will curdle, and if the curdling is not happening, press the saute button again and let the milk simmer for two minutes. Then add one or two tsps of extra vinegar and mix. Please turn off the Instant Pot and let it rest for 10 minutes. The milk will curdle slowly.
- PS – I never had to simmer the milk again. I have tried this method many times. With 1 tbsp of vinegar, the milk always curdles perfectly. Depending upon the milk temperature and the quantity, the boiling time might vary.
Straining the curds-
- Meanwhile, put the cheesecloth or muslin cloth on top of a colander. I used my cheesecloth bag.
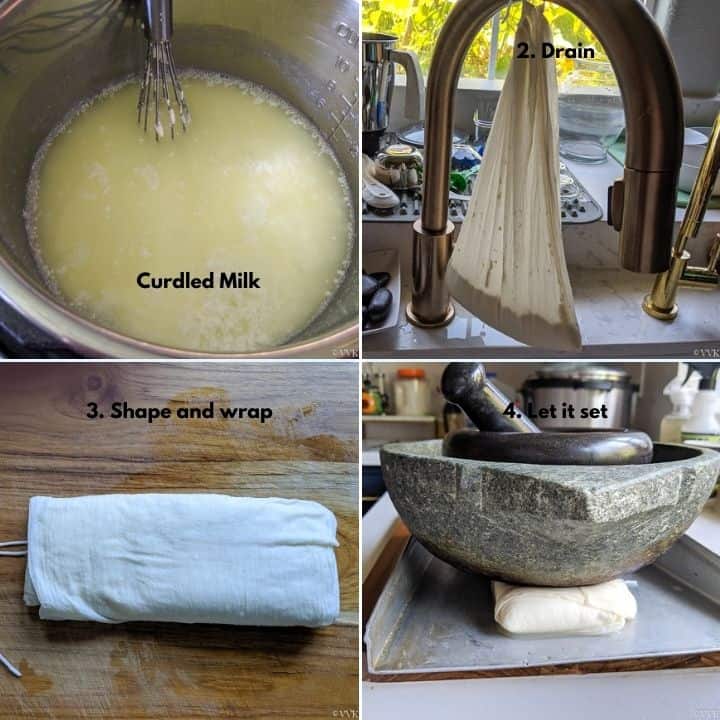
- Pour the curdled milk mixture into the colander or the cheesecloth bag and drain the whey water. Gently rinse it with cold water to ensure paneer doesn’t get the flavor of vinegar.
- Gently press and squeeze out as much as water you can. Now tie the cheesecloth and hang it for ½ an hour. I usually hang it on my kitchen faucet.
Pressing and setting-
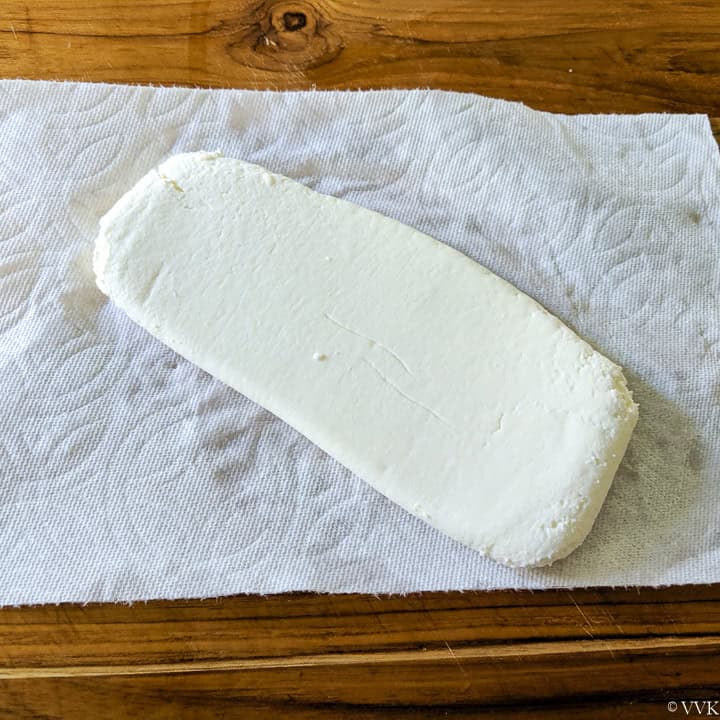
- After half an hour, remove the knot and fold the cheesecloth so that the paneer forms a bundle. Flatten this a little and place it on a flat surface. Now place a heavy object on top of this paneer bundle. Make sure the heavy object doesn’t topple. A pressure cooker filled with water or heavy soapstone vessel works well. As you can see in the picture, I used a soapstone vessel.
For Paneer-
- Leave it for 2 to 3 hours so that the paneer sets well.
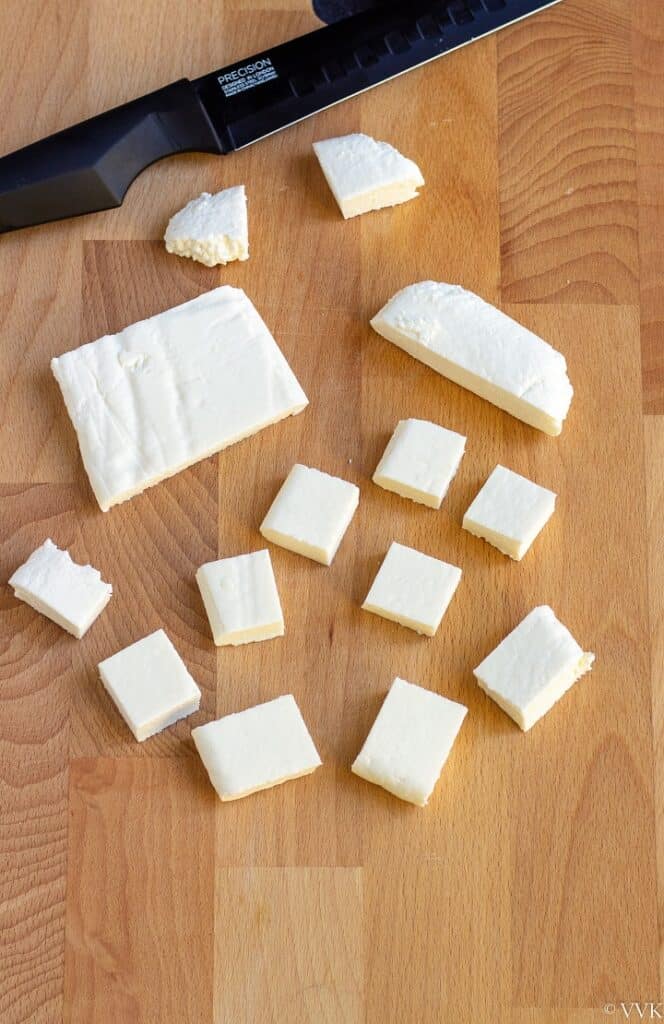
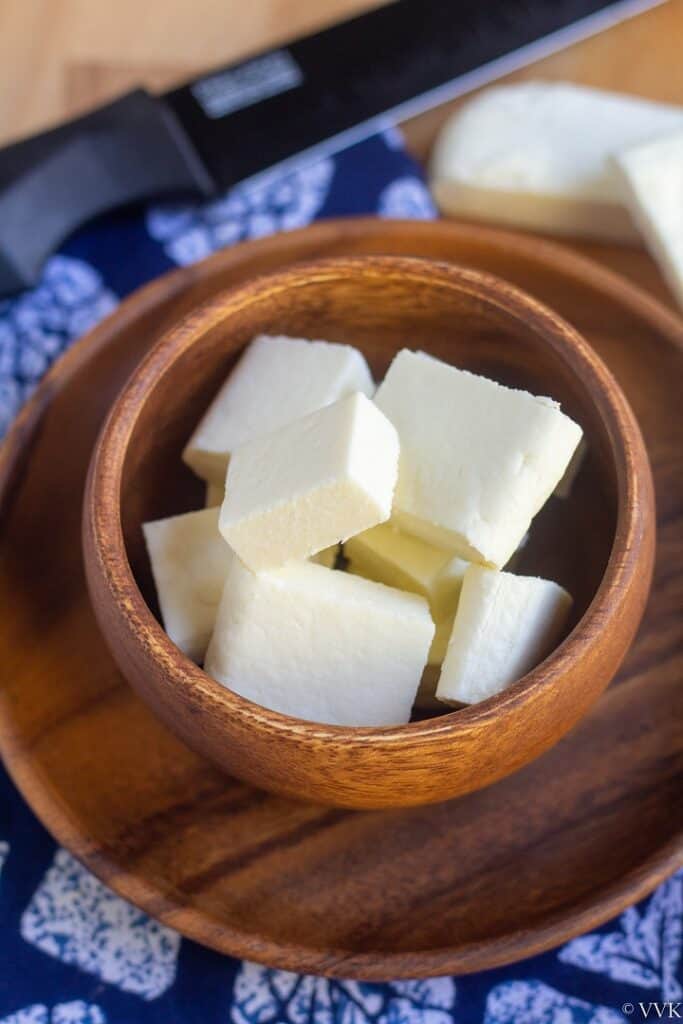
- After 2 to 3 hours, remove the cheesecloth and refrigerate it for 30 minutes and then cut into cubes. I always refrigerate for 30 minutes before cutting the paneer. It makes it a bit firm.
- That’s it. Paneer is ready. Use it in your favorite curries, paratha, and other dishes.
For Chhenna-
- Keep the heavy object for just 5 minutes, and then you can use it for sweets like kalakhand, rasmalai, rasgulla, etc. At this, it is more like ricotta cheese.
Recipe Notes-
- Instead of vinegar, you can use lime or lemon juice as well. The same amount should be sufficient. Always have one or two tsps extra to add if the milk doesn’t curdle.
- Ensure you gently rinse the paneer to remove the flavors of vinegar or lemon/lime juice, especially if you are using the fresh paneer/chhena for sweets.
- You can boil the milk in your preferred way.
- I always turn off the heat before adding the vinegar. Do not cook the milk after adding vinegar. If, and only if, your milk doesn’t curdle, heat your milk again for two to three minutes but not more than that.
PS: Follow me on Instagram or join my Facebook Group for more gardening and recipe updates. If you try this homemade paneer, please don’t forget to comment and rate this recipe. If you have any questions, please leave a comment, and I will get to it asap. Make sure to follow me on my Pinterest for more healthy and delicious ideas!
📖 Recipe
Homemade Paneer | How to Make Paneer | Indian Cottage Cheese
Equipment
- Saucepan or Instant Pot to boil the milk
- Strainer/colander and cheesecloth
Ingredients
- 5 cups reduced-fat milk
- 1 tbsp vinegar plus 1 to 2 tsps extra
Instructions
Boiling milk on stove-top-
- In a saucepan, add the milk and bring it to a boil.
- When the froth forms on the top, turn off the heat and let the milk rest for a minute.
- Add the vinegar and mix well. The milk will start to curdle. Mix again. If the curdling is not happening, add a little more vinegar.
- Let it rest for 10 minutes. Slowly the milk will start to curdle, and you can see the curds.
Boiling milk on Instant Pot-
- Add the milk to the inner pot of the instant pot and press the yogurt button. The display should show “boil,” and it will blink. Leave it for a few seconds, and it will beep and stay in the boil mode.
- Cover the IP with lid, and in 20 to 24 minutes, when the boiling is complete, Instant Pot will beep, and it will go to the “Yogurt” mode automatically. Now turn off the IP and remove the lid.
- Add the vinegar and mix well. The milk will curdle, and if the curdling is not happening, press the saute button again and let the milk simmer for two minutes. Then add one or two tsps of extra vinegar and mix. Please turn off the Instant Pot and let it rest for 10 minutes. The milk will curdle slowly.
- PS – I never had to simmer the milk again. I have tried this method many times. With 1 tbsp of vinegar, the milk always curdles perfectly. Depending upon the milk temperature and the quantity, the boiling time might vary.
Straining the curds-
- Meanwhile, put the cheesecloth or muslin cloth on top of a colander. I used my cheesecloth bag.
- Pour the curdled milk mixture into the colander or the cheesecloth bag and drain the whey water. Gently rinse it with cold water to ensure paneer doesn’t get the flavor of vinegar.
- Gently press and squeeze out as much as water you can. Now tie the cheesecloth and hung it for ½ an hour. I usually hung it on my kitchen faucet.
Pressing and setting
- After half an hour, remove the knot and fold the cheesecloth so that the paneer forms a bundle. Flatten this a little and place it on a flat surface. Now place a heavy object on top of this paneer bundle. Make sure the heavy object doesn’t topple. A pressure cooker filled with water or heavy soapstone vessel works well. As you can see in the picture, I used a soapstone vessel.
For Paneer-
- Leave it for 2 to 3 hours so that the paneer sets well.
- After 2 to 3 hours, remove the cheesecloth and refrigerate it for 30 minutes and then cut into cubes. I always refrigerate for 30 minutes before cutting the paneer. It makes it a bit firm.
- That’s it. Paneer is ready. Use it in your favorite curries, paratha, and other dishes.
For Chhenna | Chenna
- Keep the heavy object for just 5 minutes, and then you can use it for sweets like kalakhand, rasmalai, rasgulla, etc. At this, it is more like ricotta cheese.
Notes
- Instead of vinegar, you can use lime or lemon juice as well. The same amount should be sufficient. Always have one or two tsps extra to add if the milk doesn’t curdle.
- Ensure you gently rinse the paneer to remove the flavors of vinegar or lemon/lime juice, especially if you are using the fresh paneer/chhena for sweets.
- You can boil the milk in your preferred way. I always turn off the heat before adding the vinegar. Do not cook the milk after adding vinegar. If and only if your milk doesn’t curdle, heat your milk again for two to three minutes but not more than that.
Nutrition
I am not a nutritionist. The nutritional information is provided as a courtesy and is an estimate only. It varies depending upon the product types or brands.

How many days will this paneer last if refrigerated mam?
I have tried storing upto 4 days.
Home made over store bought anyday! :) Looks nice.
Thanks GB.
Homade paneer s always best.. Grt da
Thanks ma.
Looks perfect, Vidya :) Home made paneer is so much better!
Thanks a lot Freda. :-)