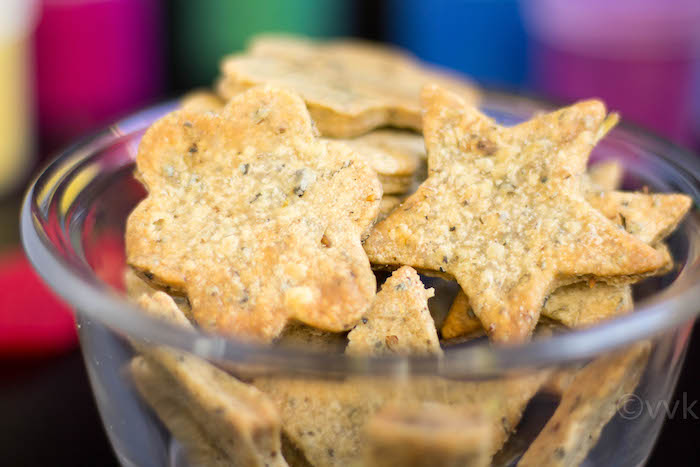
Holi special Baked Methi Mathri recipe – flaky savory biscuits with all purpose flour, wheat flour, semolina & dried fenugreek leaves.
Baked Methi Mathri
Holi, the festival of colors is in a couple of weeks’ time, and when I saw Holi Recipes as one of the Blogging Marathon themes for this month, without any second thought, I picked it up. All the chaats and snacks, fall under the Holi recipe category, and I have posted most of them last September. This time, I wanted to keep it simple and healthy yet delicious. So I am starting off with perfect tea time snack – Methi Mathri, precisely Baked Methi Mathri.
What is Mathri?
Mathri is a flaky, savory biscuits prepared mainly with flour and it is pretty popular in North West India. There are different varieties of Mathri based on the flavor like masala mathri, methi mathri, plain jeera mathri, etc. Today I am going to share the baked version of the methi mathri. When I was searching for traditional Holi recipes, I stumbled upon this NDTV food link, and I picked three from there. Can you guess what would be the other two?
I was contemplating if I should fry or bake. As my attempts with baking murukku, vada, tikki, and shankarpaare were successful, I thought of baking these mathris. Touchwood, I was able to get crispy and crunchy guilt free snacks this time too. :-) Instead of adding my observations in the notes section, I thought of adding it here. The key thing to get a crunchy mathri is entirely dependent upon the thickness of the mathri.
Baked Methi Mathri Tips
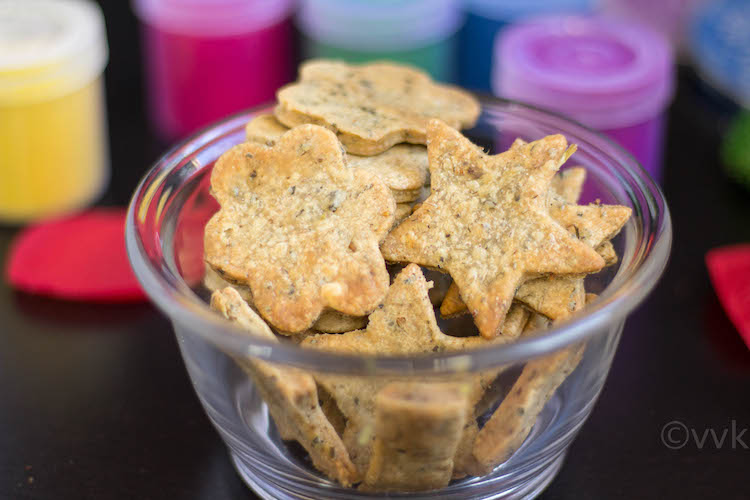
Try to roll it thin, less than or equal to ¼ inch. I tried a few pieces with ½ inch thickness, and they took comparatively longer time to bake and also the next day they were bit hard. But the thin ones stayed crisp and crunchy for two plus days. (Being a savory person, I munched them all)
The time to bake is dependent on the oven temperature. I baked at 375 deg F for 12 minutes and flipped them and then baked for 13 minutes. You can try at 350 deg F or 400 deg F too.
Here is how I prepared the mathri (printable recipe at the bottom).
Baked Methi Mathri Recipe
Ingredients:
- Rava / Semolina / Fine Sooji – ⅓ cup
- Maida / All Purpose Flour – ⅓ cup
- Wheat Flour – ⅓ cup
- Ajwain / Carom Seeds – ½ tsp
- Jeera / Cumin Seeds – ½ tsp
- Salt – 1 tsp
- Pepper Powder – ½ tsp
- Kasoori Methi / Dried Fenugreek Leaves. – 1 tbsp
- Ghee – 2 tbsp
- Oil – 2 tsps + for greasing
- Water – ½ cup
Prep – Work:
- Crush the ajwain and jeera in a mortar pestle or just pulse them coarsely in the blender and set aside.
- Sieve the maida and wheat flour.
Steps:

- In a wide mixing bowl, add the maida, wheat flour, semolina and the salt.
- Add the melted ghee and two tsps of oil and mix the ingredients nicely. Make sure the ghee and oil are incorporated nicely.

- Now add the pepper powder, crushed ajwain-jeera mix, and kasoori methi and mix again.

- Add water little by little and mix the ingredients to form a thick dough. Do not add the entire water at one. Add water on the required basis. The dough should be thick/stiff and moist.
- You don’t need to knead the dough. Once the dough is formed, cover it a bowl or damp cloth and let it sit for 15 to 20 minutes.
- Meanwhile, cover a baking tray with parchment paper or aluminum foil. If using aluminum foil, spray some oil and set aside.
- Pre heat the oven to 375 degree Celsius.
- After 20 minutes, divide the dough into two parts and start to roll them. If the working surface is big enough, you don’t need to divide the dough. Roll them like a roti with ¼ inch thickness.
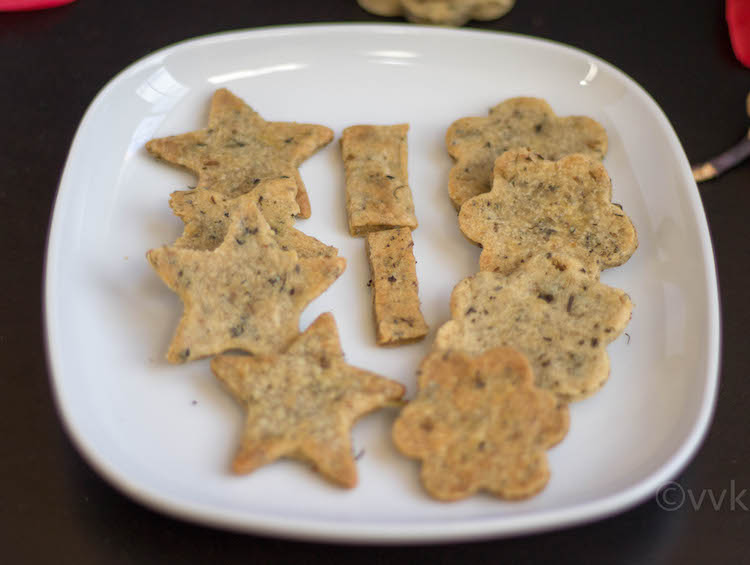
- Using a cookie cutter, carve out your favorite shapes and place them on the baking tray.
- Do the same for the rest of the dough.
- Brush the carved out mathris with oil using a baking brush.

- Now, bake this for 12 minutes at 375 degrees.
- After 12 minutes, flip them and grease them with oil again which is optional.
- Bake it again for 15 minutes.
- Let it cool and store in airtight container. After 15 minutes, if you feel that they mathris are still uncooked, baked again for five more minutes. As I mentioned the baking time depends on the thickness.
Notes:
- Adding Rava or semolina is optional. You can ignore rava and go with the half cup of maida and half cup of wheat flour.
- Instead of adding ghee and oil, you can add either one.
- I love the flavor of kasoori methi, so went with 1 tbsp for this measure. But please adjust the kasoori methi as per your taste preference.
- I did not add chili powder and also turmeric powder. I just went with ½ tsp of pepper powder for spice. But you can replace that with chili powder. Of course, the color changes when you add both chili and turmeric powder.
- Brushing the mathris before baking and while flipping with oil is completely optional. The oil usage is comparatively less, so I went ahead and brushed them.
- The baking temperature depends upon the thickness of the mathris. So roll them thin as much as you can for crispy mathris.
Enjoying Baked Methi Mathri? You will love these, too:
- Rava Idli | Semolina Idli
- Simple Lunch Menu with Methi Paratha
- Rava Kesari | Holi special
- Vendiya Keerai Kuzhambu | Methi leaves Sambar
- Methi Paratha | Methi Paratha with Fresh Fenugreek Leaves
Have you made made this recipe?
If you’ve made this Baked Methi Mathri recipe, please share your photos with me on Pinterest, Facebook, Instagram, YouTube or Twitter – I will be delighted to see your results!
📖 Recipe
Baked Methi Mathri
Ingredients
Instructions
Prep Work
- Crush the ajwain and jeera in a mortar pestle or just pulse them coarsely in the blender and set aside.
- Sieve the maida and wheat flour.
Procedure
- In a wide mixing bowl, add the maida, wheat flour, semolina and the salt.
- Add the melted ghee and two tsps of oil and mix the ingredients nicely. Make sure the ghee and oil are incorporated nicely.
- Now add the pepper powder, crushed ajwain-jeera mix, and kasoori methi and mix again.
- Add water little by little and mix the ingredients to form a thick dough. Do not add the entire water at one. Add water on the required basis. The dough should be thick/stiff and moist.
- You don’t need to knead the dough. Once the dough is formed, cover it a bowl or damp cloth and let it sit for 15 to 20 minutes.
- Meanwhile, cover a baking tray with parchment paper or aluminium foil. If using aluminum foil, spray some oil and set aside.
- Pre heat the oven to 375 degree Celsius.
- After 20 minutes, divide the dough into two parts and start to roll them. If the working surface is big enough, you don’t need to divide the dough. Roll them like a roti with ¼ inch thickness.
- Using a cookie cutter, carve out your favorite shapes and place them on the baking tray.
- Do the same for the rest of the dough.
- Brush the carved out mathris with oil using a baking brush.
- Now, bake this for 12 minutes at 375 degrees.
- After 12 minutes, flip them and grease them with oil again which is optional.
- Bake it again for 15 minutes.
- Let it cool and store in airtight container. After 15 minutes, if you feel that they mathris are still uncooked, baked again for five more minutes. As I mentioned the baking time depends on the thickness.
Notes
- Adding Rava or semolina is optional. You can ignore rava and go with half cup of maida and half cup of wheat flour.
- Instead of adding ghee and oil, you can add either one.
- I love the flavor of kasoori methi, so went with 1 tbsp for this measure. But please adjust the kasoori methi as per your taste preference.
- I did not add chilli powder and also turmeric powder. I just went with ½ tsp of pepper powder for spice. But you can replace that with chilli powder. Of course, the color changes when you add both chilli and turmeric powder.
- Brushing the mathris before baking and while flipping with oil is completely optional. The oil usage is comparatively less so I went ahead and brushed them.
- The baking temperature depends upon the thickness of the mathris. So roll them thin as much as you can for crispy mathris.
Nutrition
I am not a nutritionist. The nutritional information is provided as a courtesy and is an estimate only. It varies depending upon the product types or brands.
Submitting this post for the BM# 73. Check out the other participant details here.




Hi Vidhya
Good recipe for the kids. I would be trying it tonight.. just wanted to know in which rack should we place the baking tray. Pardon me for the silly question… I am a newbie to OTG cooking :) [Purchased OTG this sunday]
I would say the middle rack. It’s the safe bet for all dishes be it cookies or cakes or this kind of savory bake.
I too have made baked mathri once, such an addictive snack! cute shapes!
Thanks :-)
I love mathris. Your baked version sounds really good.
Thanks Jayashree.
I used to make these very frequently and you have reminded me to bake them again :)
:-) Thanks Harini.
Love them these arre my favourite snack but the oil that goes in it stops me from touching them. Must try.
Thanks :-)
loved the spices used in these biscuits
:-) Thanks Chef.
Such addictive mathris srividhya..I am sure baking these makes it so healthy to indulge in.
:-) Thanks Valli.
Those mathri look guilt-free, flavorful and addictive.
Thanks Pavani.
Love the idea of baking instead of frying. It looks perfect.I’m gonna try this definitely
Please do try Sandhiya. Thanks a lot
They look awesome!! Kids will totally fall in loved with this cuties!!
:-) Thanks Sharmila
My kind of munchies, i cant keep myself from these mathris if i make them at home. Love it to the core.
Thanks.. Same here. Love these with chai.
I once baked mathri and came out good. Love those cute shapes of the mathri
Thanks Usha.
Love the baked version of the mathri. I can absolutely eat them guilt free :)
Yup. Thanks Sandhya.
Look so crispy. Thanks for the recipe.
:-) Thanks a lot