

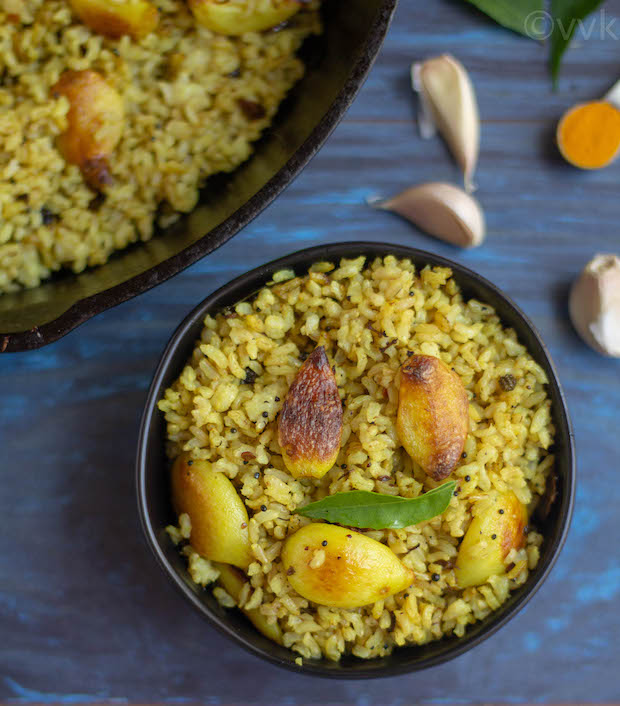
Make this lip-smacking garlic rice (poondu sadam as we say in Tamil) with leftover rice in less than 30 minutes. Leftover makeover cannot get any easier than this. This postpartum diet style garlic rice with bursting flavors will surely tingle your taste buds.
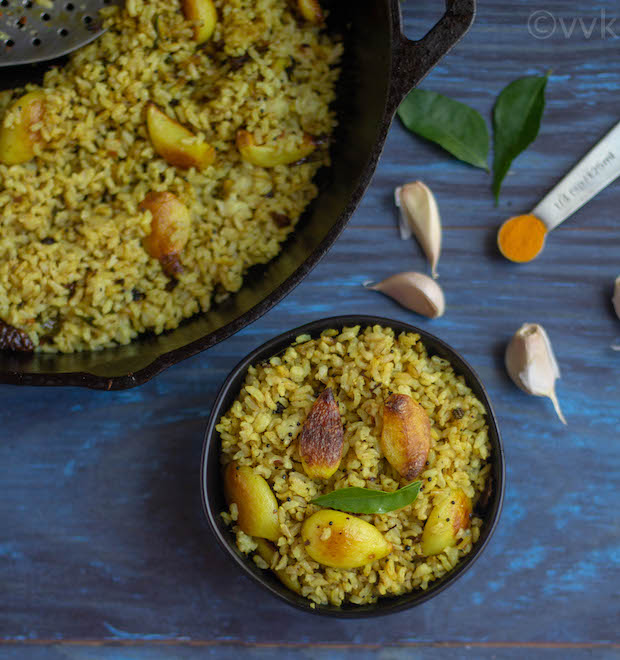 If you are wondering what to do with that leftover rice? Here comes my irresistible garlic rice cooked with sun-dried turkey berries, black nightshade berries, dried curd/yogurt chilies, and dried neem flowers. It is not the Indo-Chinese style rice, it the traditional postpartum style garlic rice, easily digestible and healthy too.
Postpartum Diet:
As I mentioned in the postpartum recipes page, the postpartum diet is a well-balanced diet that is believed to help in better digestion for lactating moms, which in turn prevents colic in babies. In Tamil, we call this diet as “pathiya samayal.”
My MIL used to make this for me during my postpartum time of course without dried chilies and freshly cooked rice. We don’t use dried and fresh chilies in the postpartum diet.
What’s Special about this Garlic Rice?
Of course, it is super easy to make. Once you have the garlic peeled, you can make this in no time with leftover rice. We don’t need to chop any other vegetables. All you have to do is fry the sun-dried berries, curd chilies, and neem flowers and then do the tempering and saute garlic until the garlic turns brown. Finally, mix the rice and serve hot. You can serve this rice without any side or with plain yogurt or raita.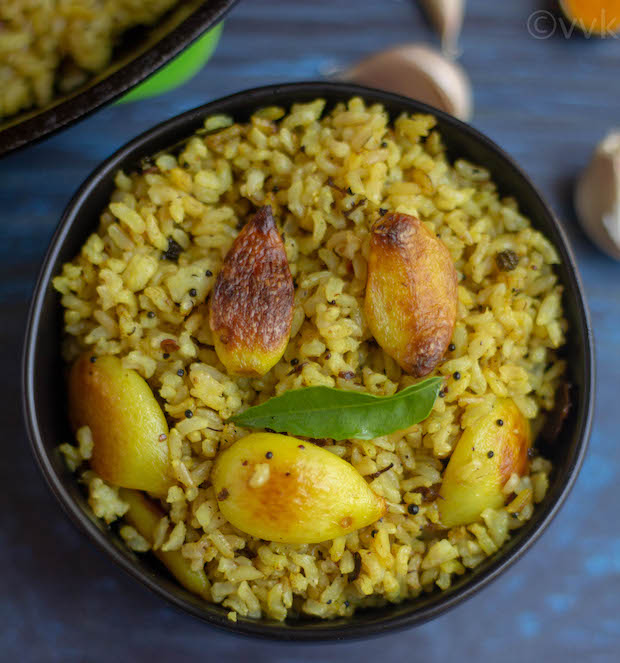 There is no set recipe for this rice. You can adjust the ingredients according to your preference.
How to make this garlic rice postpartum-diet friendly?
If you are making this for new moms, then skip the dried curd chilies or mor milagai and also use freshly cooked rice. Make sure to cool the rice before mixing. To spice up the rice, you can use freshly ground black or white pepper.
The traditional ingredients that I am using here are,
- Manathakkali Vathal or the dried sun berries or the black nightshade berries.
- Sundaikai Vathal or the dried turkey berries.
- Mor milagai or dried curd chilies
- Vepampoo or dried neem flowers.
As I mentioned in the vathal kuzhambu recipe, vathals are sun-dried vegetables. You can easily find them on Indian groceries are on Amazon online. I have included the Amazon links as well. These ingredients have a longer shelf life, and they stay good for years. Apart from using for this recipe, you can use dried berries for vathal kuzhambu, neem flowers for rice and rasam, dried chilies for upma or just as a side for yogurt rice.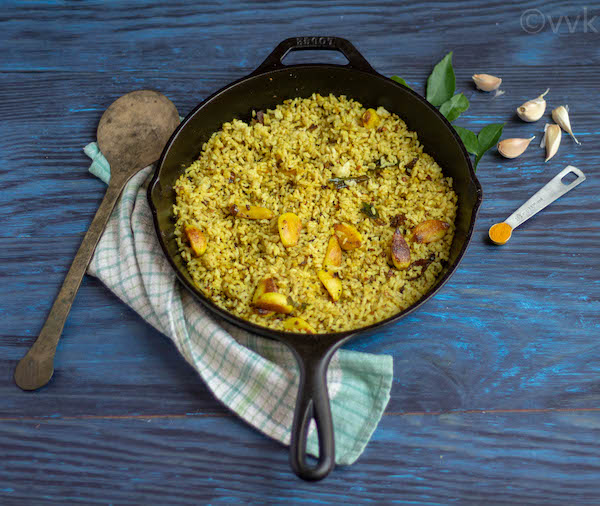 These ingredients add spiciness, slight bitterness, and salty flavor to this rice recipe. And along with garlic, curry leaves, the flavors are enhanced further.
What if I can’t Source the Traditional Ingredients?
I can hear you all. If you can’t source the ingredients, you can, of course, skip them. Yes, the flavor profile will be different. But just garlic along with curry leaves and white or black pepper is sufficient to add that kick. I have tried without sun-dried berries also.
Now without any further ado, here is how I made this recipe. And for the first time, I created a Tamil video for this recipe. I have included subtitles as well. Let me know your thoughts and feedback.
How to make Garlic Rice or Poondu Sadam?
Heat the pan over medium heat and add 2 tbsp of gingelly oil.

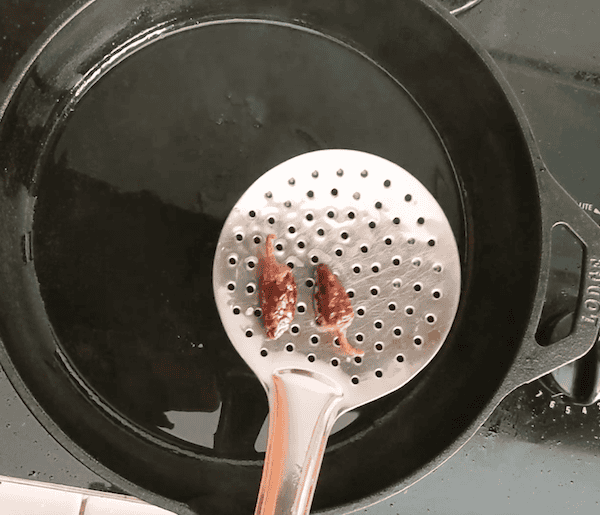
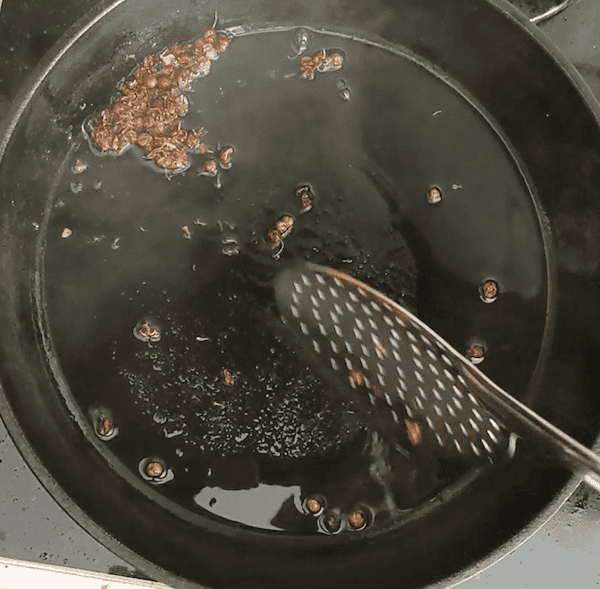
When the oil is hot, add the dried curd chilies and shallow fry for 2 minutes or until it turns brown. Remove it from the pan and set it aside.
In the same pan, add ten dried turkey berries and shallow fry it 90 to 120 seconds or until it changes the color to slightly dark brown. Remove it from the pan and set it aside.
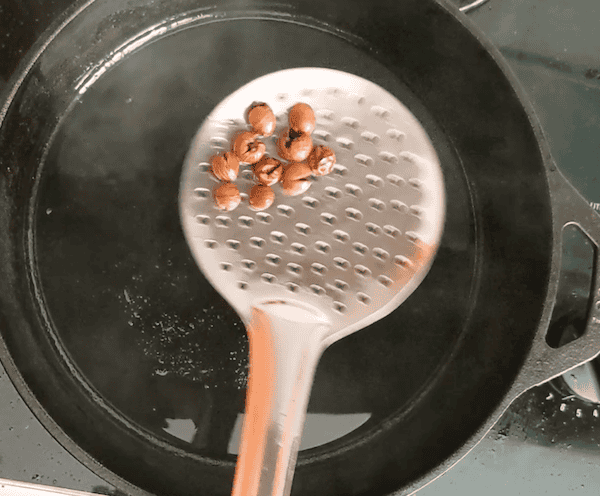
In the same pan, add 1 tsp of black nightshade berries, and ½ tsp dried neem flowers and shallow fry for 20 to 30 seconds. Remove it from the pan and set it aside.
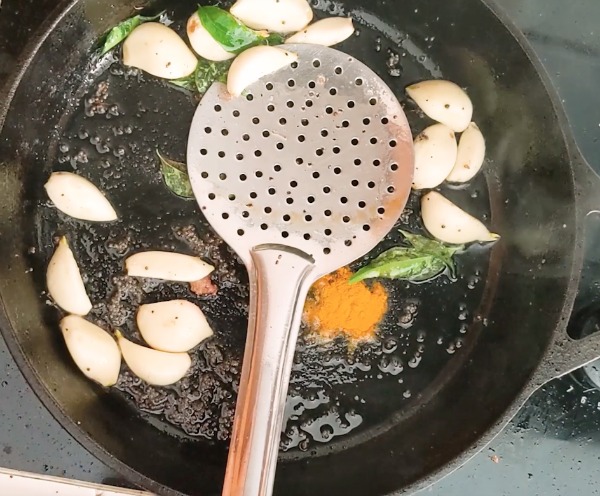
Now in the same pan, add 1 tsp mustard seeds, asafoetida, and 15 garlic cloves. Mix and add few Curry leaves and ¼ tsp turmeric powder.
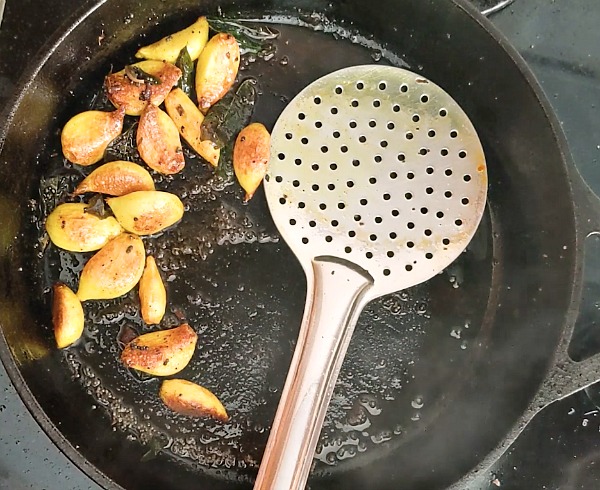
Shallow fry until the garlic turns brown. It usually takes about four to five minutes over medium heat.
Reduce the heat and add 3 cups of cooked rice. Then add ½ tsp of salt.
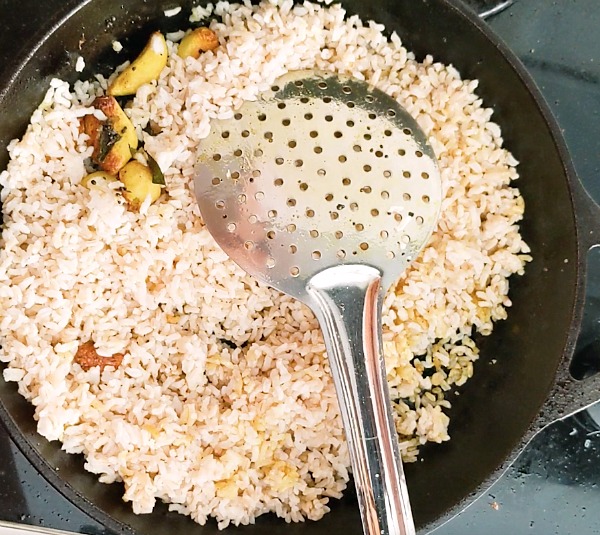
Now crush the dried berries, neem leaves, and the chilies and add it to the rice.
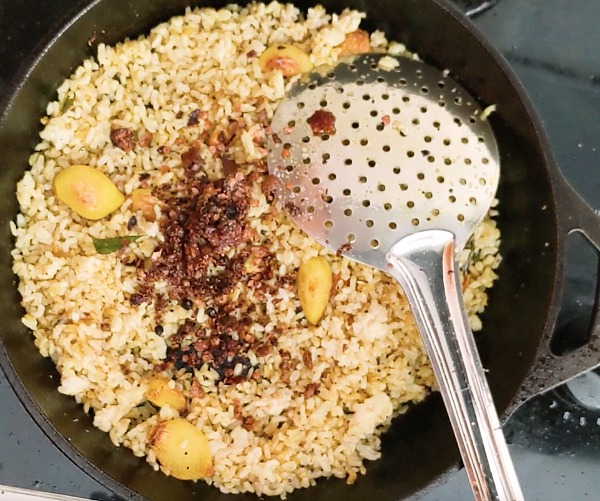
Mix them all, and that’s it, the garlic rice is ready.
Recipe Notes:
- I am using sesame oil for this recipe. But you can use oil of your choice.
- I shallow-fried the ingredients separately until it changes the color. The frying-time is different for each ingredient, and it doesn’t take more than 2 minutes to fry each. So do not let it unattended for a long time. Burned berries don’t taste good.
- If time is pressing, then you can fry all the ingredients together too but do it over medium-low heat and remove the black nightshade berries and neem flowers first.
- Also, do not too much salt. The dried berries have salt in them. So after mixing the rice, taste it and add accordingly.
- I personally like whole garlic cloves, but you can chop them roughly or finely as well.
- Adjust the berries and neem flowers according to your preference.
- I used cooked hand-pound rice for this recipe. But you can use any variety.
PS: Follow me on Instagram or join my Facebook Group for more gardening and recipe updates. If you try this kali dal, please don’t forget to comment and rate this recipe.
📖 Recipe
Garlic Rice | Poondu Sadam
Equipment
- Cast Iron Pan or Kadai
Ingredients
- 2 tbsp sesame oil
- 2 sun-dried chilies
- 10 sun-dried turkey berries
- 1 tsp sun-dried black nightshade berries
- ½ tsp dried neem flowers
- 1 tsp mustard seeds
- ½ tsp asafoetida
- 15 garlic cloves
- 5 to 6 curry leaves
- ¼ tsp turmeric powder
- 3 cups cooked rice
- ½ tsp salt
Instructions
- Heat the pan over medium heat and add 2 tbsp of gingelly oil.
- When the oil is hot, add the dried curd chilies and shallow fry for 2 minutes or until it turns brown. Remove it from the pan and set it aside.
- In the same pan, add ten dried turkey berries and shallow fry it 90 to 120 seconds or until it changes the color to slightly dark brown. Remove it from the pan and set it aside.
- In the same pan, add 1 tsp of black nightshade berries, and ½ tsp dried neem flowers and shallow fry for 20 to 30 seconds. Remove it from the pan and set it aside.
- Now in the same pan, add 1 tsp mustard seeds, asafoetida, and 15 garlic cloves. Mix and add few Curry leaves and ¼ tsp turmeric powder. Shallow fry until the garlic turns brown. It usually takes about four to five minutes over medium heat.
- The garlic is ready. Reduce the heat and add 3 cups of cooked rice. Then add ½ tsp of salt.
- Now crush the dried berries, neem leaves, and the chilies and add it to the rice. Mix them all, and that's it, the garlic rice is ready.
Video
Notes
- I am using sesame oil for this recipe. But you can use oil of your choice.
- I shallow-fried the ingredients separately until it changes the color. The frying-time is different for each ingredient, and it doesn't take more than 2 minutes to fry each. So do not let it unattended for a long time. Burned berries don't taste good.
- If time is pressing, then you can fry all the ingredients together too but do it over medium-low heat and remove the black nightshade berries and neem flowers first.
- Also, do not too much salt. The dried berries have salt in them. So after mixing the rice, taste it and add accordingly.
- I personally like whole garlic cloves, but you can chop them roughly or finely as well.
- Adjust the berries and neem flowers according to your preference.
- I used cooked hand-pound rice for this recipe. But you can use any variety.
Nutrition
I am not a nutritionist. The nutritional information is provided as a courtesy and is an estimate only. It varies depending upon the product types or brands.

Leave a Reply